Arguably, this skill would come in handy during a stealth attempt gone wrong, but seeing as players would rather restart the heist/day entirely when this happens than going loud, it may not see much use. Outside of conventional heists, escape scenarios are some of the few places where this skill could shine, especially on higher difficulties or when the crew is scattered and cannot regroup in time to save a downed heister, though whether it can be used or not depends largely on the scenario being played at the time.
Arguably, this skill would come in handy during a stealth attempt gone wrong, but seeing as players would rather restart the heist/day entirely when this happens than going loud, it may not see much use. Outside of conventional heists, escape scenarios are some of the few places where this skill could shine, especially on higher difficulties or when the crew is scattered and cannot regroup in time to save a downed heister, though whether it can be used or not depends largely on the scenario being played at the time.
{{!}}-{{!}}Kilmer=
{{!}}-{{!}}Kilmer=
−
{{color|negative|''Kilmer's basic effects were revised and moved to [[Aggressive Reload]], the aced version's accuracy-increasing effect was buffed and moved to the aced version of [[Rifleman]], and its reload-while-sprinting effect was moved to the aced version of [[Parkour]].''}}
+
{{color|negative|''Kilmer's basic effects were revised and moved to [[Aggressive Reload]], the aced version's accuracy-increasing effect was altered and moved to the aced version of [[Rifleman]], and its reload-while-sprinting effect was moved to the aced version of [[Parkour]].''}}
{{Skill|Kilmer|5|Mastermind|Increases your reload speed with assault rifles and sniper rifles by 25%.|Your weapon accuracy while moving with assault rifles and sniper rifles is increased by 50% and you can now reload your weapons while sprinting.}}
{{Skill|Kilmer|5|Mastermind|Increases your reload speed with assault rifles and sniper rifles by 25%.|Your weapon accuracy while moving with assault rifles and sniper rifles is increased by 50% and you can now reload your weapons while sprinting.}}
Line 429:
Line 429:
*The [[OVE9000]], [[GL40 (Payday 2)|GL40]], [[Piglet]], and [[HRL-7]] are not affected by this skill.
*The [[OVE9000]], [[GL40 (Payday 2)|GL40]], [[Piglet]], and [[HRL-7]] are not affected by this skill.
{{!}}-{{!}}Die Hard=
{{!}}-{{!}}Die Hard=
−
{{color|negative|''[[Die Hard]] was changed completely and its Basic effects became a default gameplay feature, while its Aced effect was buffed, changed to effect the entireteam,and moved to [[Shock And Awe]].''}}
+
{{color|negative|''[[Die Hard]] was changed completely and its Basic effects became a default gameplay feature, while its Aced effect was moved to the Basic version of [[Resilience]].''}}
{{Skill|Die Hard|2|Enforcer|You can use your primary weapon in bleedout.|Your armor recovers 15% faster.}}
{{Skill|Die Hard|2|Enforcer|You can use your primary weapon in bleedout.|Your armor recovers 15% faster.}}
Line 499:
Line 499:
* It is possible to equip the primary and secondary saw at the same time, although the only benefit of such setup is the ''slightly'' larger starting saw ammo pool.
* It is possible to equip the primary and secondary saw at the same time, although the only benefit of such setup is the ''slightly'' larger starting saw ammo pool.
{{!}}-{{!}}Man of Iron=
{{!}}-{{!}}Man of Iron=
−
{{color|negative|''Man of Iron was renamed to [[Iron Man]], and its Basic effect moved to its Aced effect. Man of Iron's Aced effect was split and moved to [[Shock And Awe]] and [[Lock N' Load]].''}}
+
{{color|negative|''Man of Iron was renamed to [[Iron Man]], and its Basic effect moved to its Aced effect. Man of Iron's Aced effect was split and moved to the Aced versions [[Shock And Awe]] and [[Lock N' Load]].''}}
{{Skill|Man of Iron|6|Enforcer|Unlocks the ability for you to wear the [[Armor#Improved Combined Tactical Vest|Improved Combined Tactical Vest]].|When you melee Shield enemies, they get knocked back by the sheer force. Run and shoot – you can now shoot from the hip while sprinting.}}
{{Skill|Man of Iron|6|Enforcer|Unlocks the ability for you to wear the [[Armor#Improved Combined Tactical Vest|Improved Combined Tactical Vest]].|When you melee Shield enemies, they get knocked back by the sheer force. Run and shoot – you can now shoot from the hip while sprinting.}}
Line 532:
Line 532:
*The name of the skill is a reference to the 1993 science-fiction film ''{{w|Demolition Man (film)|Demolition Man}}''.
*The name of the skill is a reference to the 1993 science-fiction film ''{{w|Demolition Man (film)|Demolition Man}}''.
{{!}}-{{!}}Nerves of Steel=
{{!}}-{{!}}Nerves of Steel=
−
{{color|negative|''Nerves of Steel's basic effects was moved to the basic version of the [[Die Hard]] skill, and its aced effects became a default gameplay feature.''}}
+
{{color|negative|''Nerves of Steel's basic effects were moved to the basic version of the [[Die Hard]] skill, and its aced effects became a default gameplay feature.''}}
{{Skill|Nerves of Steel|1|Technician|You take 50% less damage while interacting with things.|You can now use steel sight while in bleedout.}}
{{Skill|Nerves of Steel|1|Technician|You take 50% less damage while interacting with things.|You can now use steel sight while in bleedout.}}
Latest revision as of 02:45, 19 January 2022
This article is about the skills that have been removed from the game. For skills that can still be used in the latest versions, see Skills.
Over the course of PAYDAY 2's lifespan, some skills have been removed from the game, either because they had too little use, or were too useful to pass up in most builds, and replaced with new skills. These skills are preserved here. Some skills removed from the PC version are still available on some console versions, due to receiving fewer updates.
Updates #25 and #39 saw the removal of several skills, the former as part of a stealth overhaul, and the latter also saw the introduction of the Fugitive skill tree and the removal of skill tree tiers, replaced with the Perk Decks mechanic.
These skills (and the skill tree tiers) are still available on the Playstation 3 and XBOX 360 versions of the game.
In Update #39, Control Freak replaced this skill and had its aced effects merged with it.
Inside Man
Mastermind
Tier 2
Basic (1 pt): Reduces the asset costs in the Job Overview menu by 50%.
Ace (3 pt): Unlocks special Inside Man assets in the Job Overview menu.
Strategy[]
A player with the Inside Man skill should ideally purchase most assets in most heists, as they only pay 50% of the price. The Mastermind skill tree provides a further multiplicative 50% reduction of asset prices through the tier 6 bonus to 75%. Acing this skill also makes several exclusive assets purchasable, including a keycard on Framing Frame Day 1 and Big Bank, a poisoned cake on Big Bank, and an Expert Driver on many missions. Expert Driver completely negates the chance of an escape mission.
Inside Man can be considered very much a "team-player" skill. On certain stealth focused maps, like Framing Frame Day 1 or Big Bank, a single player with Inside Man aced offers very advantegous assets denied to people without the aced skill.
In Update #39, Fast Learner was replaced by Painkillers and the full effect of this skill moved into the Perk Decks.
Fast Learner
Mastermind
Tier 2
Basic (1 pt): You gain 15% more experience for finishing days and jobs.
Ace (3 pt): Your crew gains 30% more experience when you complete days and jobs.
Mechanics[]
The experience bonus from the basic skill does stack with the experience bonus of the aced skill, resulting in a total bonus of 45%. However, if multiple players on a team have aced this skill, the bonus will be applied only once and will not stack.
Strategy[]
Once the player reaches level 100, this skill becomes completely useless except for helping other lower players to level. However, at all lower levels, this skill is invaluable. Over the course of leveling from 0 to 100, this skill will save millions of experience points for the player, greatly increasing leveling speed. Even if the player has no desire to pursue the mastermind tree, this skill is highly recommended for any build. Once a player reaches 100, they should drop this skill to free up 4 additional skill points.
In Update #25, Smooth Talker was replaced with the Spotter skill. Crews can now answer 4 pagers by default without the need of any skills.
Smooth Talker
Mastermind
Tier 3
Basic (1 pt): You can successfully answer 4 pagers instead of just 2.
Ace (3 pt): Special enemies marked by you take 15% additional damage.
Mechanics[]
If a guard is killed during the stealth part of a mission, his pager will start beeping after 3 seconds. If it is ignored for 7 seconds, the pager operator on the other side will raise the alarm. To prevent this, players must answer the pager by interacting with it for a period of time. It takes 10 seconds to complete the interaction. Any given pager will beep and require attention only once; once it it successfully answered, that particular pager will not be of further concern. The first two pagers answered per mission day will always be successful upon completion of the interaction, by any player. However, third and fourth pagers on a mission day can only be successfully answered by players with the basic Smooth Talker skill, prior to the update removing this skill and granting this ability to all players. Completing the pager interaction on any pager after the second (without Smooth Talker) will result in the operator raising the alarm. Completing the pager interaction on any pager after the fourth will always fail (even with Smooth Talker).
Multiple players can attempt to answer the same pager at the same time. The first player to actually complete the interaction will trigger the appropriate response (successful persuasion or raised alarm, as described earlier), ignoring the partially completed interaction from all other players.
Interrupting an ongoing pager interaction (e.g. starting to answer it, then releasing the interaction button halfway) will cause the operator to raise the alarm immediately, unless there is anyone else answering the same pager at the same time. This potentially allows two or more players to delay a pager response indefinitely by overlapping their interaction durations.
If alarm is raised, all pager activity ceases. Players will not be able to, nor will they need to, answer any more pagers. Likewise, any ongoing answering interactions will automatically be terminated.
Only security guards carry pagers. Law enforcement officers, including street cops, and gang members of all types do not.
Strategy[]
The following missions may require pager interaction (note that most values are incorrect for the current build of Payday 2).
Bank Heist: Any variation can have 2-5 guards present, including guard in camera room.
Overall, basic Smooth Talker is a very important skill if one aims to feel comfortable and be useful during stealth. Theoretically it could be enough to have one member of the team with this skill learned. However, unforeseen complications are always possible (like another guard that needs to be dispatched quickly) and it may help to have more than one player to handle this. Having several players also has an added bonus of being able to work on killing guards independently, thus speeding up mission advancement. Situations such as this are also not uncommon: multiple pagers require attention at the same time, player(s) with this skill started answering a pager first, and a player without this skill is unable to help, since both interacting with and ignoring the pager will trigger the alarm in the end. All this considerations make it one of the most generally useful skills (if your play style involves stealth and killing at all). The cost of a mere one skill point also helps, although it requires prior investment into mastermind tree.
Aced Smooth Talker is another matter entirely. Its value is questionable. If a player needs to kill an enemy very quickly (a charging Cloaker, for example), he will most likely not have time to mark him. If there is time to spare, 15% damage bonus from this skill will at most save a few bullets for weak auto-fire weapons. It is also unclear whether or not this bonus applies if a player with this skill re-marks the enemy that was already marked by a player without it. It costs 3 skill points, requires investment in mastermind tree and a point into the skill that offers advantages for a completely different situations and play style. This skill is, perhaps, at its most when used against the Bulldozers and even then it does not offer that great of a bonus, which, again, depends heavily on the whether or not players with this skill can override other players' marking.
In Update #39, Black Marketeer's effects were completely removed from the game.
Black Marketeer
Mastermind
Tier 5
Basic (4 pt): Reduces the cost of all your purchases by 10%.
Ace (8 pt): Further reduces the cost of all your purchases by 20% and selling items is now 25% more lucrative.
Mechanics[]
Black Marketeer has no tangible effect on in-heist gameplay, though it acts as a permanent 10% "discount" on all purchasable contracts, skills or items in the store. Acing the skill brings the discount value up to 40% and increases the sellback value of weapons, weapon mods and masks by 25%.
This skill has no effect on the price of slots, which still cost $800,000 on-hand in all cases.
Strategy[]
Black Marketeer does not affect gameplay at all while a heist is in progress. Its effect comes into play only when the player is buying contracts, weapons, or skills. Acing the skill will also increase profits from sold weapons by the listed percentage. Because it neither impedes nor aids the progress of any specific heists, players creating serious, maximum efficiency builds will likely not want to use this skill.
Note that penny-pinchers can ace this skill before making large purchases, then immediately respec it back out, possibly saving money regardless. Likewise it is useful to grab just before stocking up all open slots, then going through with an Infamy reset.
In Update #39, Improved Crafting's effects were completely removed from the game.
Improved Crafting
Technician
Tier 3
Basic (1 pt): Your cost of weapon crafting is reduced by 10%.
Ace (3 pt): Your cost of mask crafting is reduced by 10%.
Mechanics[]
As stated, this skill reduces the cost of adding modifications to weapons (basic) and creating masks (aced) by 10%.
Strategy[]
It is inadvisable to get this skill, as it has no impact on gameplay while a heist is in progress, and it has very little impact outside of that. Creating masks provides no advantage to gameplay and is purely a social mechanic. By the time a player desires a mask, he or she will likely have more than enough money to make one, even without this skill. The weapon crafting cost reduction is arguably more useful, as modifying weapons does impact heisting. However, as before, weapon mods are unlocked slowly by collecting cards. By the time a player has the mods to attach, money is likely not a limiting factor.
Players with the Gage Shotgun Pack may find costs to be generally prohibitive, even at a high level. Switching between firing loadouts will cost a significant amount of spending money, especially if installing damage mods.
Trivia[]
This skill isn't incorrect when it grants a 10% boost to crafting costs, but the Technician tier bonuses will add values of 1% and 4% to their respective field.
In Update #39, Blast Radius was replaced by the basic versions of Tactical Mines and Jack Of All Trades, which together increase the trip mine radius to be equal to when this skill was aced.
Blast Radius
Technician
Tier 4
Basic (4 pt): The radius of trip mine explosions are increased by 25%.
Ace (8 pt): The radius is further increased by 75%.
Mechanics[]
Quite simply, this skill increases the range over which trip mines deal damage to enemies and destructible objects on the map. This increase in radius does not affect how many boxes are destroyed when trucks are blown open on Transport heists, nor does it affect the contents of safes.
Because of the explosion mechanics in PAYDAY 2, the trip mine deals lethal damage to anything in its area of effect, with the exception of Death Wish Bulldozers. Damage does not diminish or intensify in relation to the target's distance from the mine when it explodes.[1]
Strategy[]
If a player intends to use their trip mines only as shaped charges, this skill has no effect on gameplay and should probably not be purchased. However, for those adept at using trip mines as offensive weapons; this skill will be needed to make trip mines more effective on later levels.
Even with the basic upgrade, trip mines will be capable of wiping out a large group of enemies nearby, roughly the size of the front lobby area of the Harvest and Trustee bank. Once aced, trip mines are capable of clearing just about any enclosed space of hostiles in one go, with the slight exception of a Bulldozer at full health. However, because of Payday 2's largely urban setting, the aced version of the skill will rarely be of benefit as most areas can be covered by a single mine for maximum damage with the right placement using just the basic version. So for the sake of conserving points, it is best not to ace this skill.
Using one or both of the blast radius upgrades also make trip mines more viable as anti-swarm weapons by turning them off or setting them to sensor mode so enemies do not automatically trip them, and manually detonating them with a grenade or gunfire once a sufficient amount of enemies have massed near the mine.
In Update #25, Lucky Charm's effects were completely removed from the game.
Lucky Charm
Ghost
Tier 6
Basic (4 pt): Your chance of getting a higher quality item during a PAYDAY is increased by 50%.
Ace (8 pt): Your chance is further increased by 200%.
Mechanics[]
This skill increases the chance to receive an infamous item during a PAYDAY by the listed amount. Masks are generally the most sought after Infamous item, and with the odds of this skill mean that if a mask is selected in the PAYDAY card screen, there is a 10% chance that it will be an Infamous mask. David Goldfarb, the development director of Payday 2, tweeted that in reality the statistical likelihood is much lower.
Strategy[]
This skill has no impact on gameplay during a heist. Its only benefit is during the payday, when it increases the chance of an infamous item drop by the listed amount. Players seeking highly efficient builds should likely not invest in this skill, as it has no use in a heist, whereas players seeking to farm items will benefit greatly from this skill.
To farm cards effectively, players will likely wish to complete a simple and quick heist. Jewelry Store is the ideal candidate for this mission, because it can be completed by a group of players in under 30 seconds, and the contract is cheap to purchase. Even a solitary player with an ECM jammer can complete the mission in a short amount of time, maximizing the number of cards earned in a short period.
Players who have invested in the first Infamy tier can expect a much higher drop rate.
Trivia[]
The skill's icon is a four leaf clover, a notorious symbolistic sign of luck.
The skill isn't exactly wrong when it states that it grants a 250% total increase, but the Tier 6 Ghost Bonus of 10% will always be applied, as the skill is in Tier 6. This makes for a grand total of 260%.
Removed in Update #100[]
Update #100 introduced a complete overhaul of skills and skill trees, this including the removal of several skills, some of which introduced in earlier updates. These changes were introduced to the Playstation 4 and XBOX ONE versions as well on June 6, 2017 with the release of the Most Wanted DLC bundle.
While the skills that were in the game since its launch are still available on the Playstation 3 and XBOX 360, the skills introduced in Updates #25 and #39 have been deleted entirely.
Cable Guy's full effects were moved to the basic version of Forced Friendship.
Cable Guy
Mastermind
Tier 1
Basic (1 pt): You can cable tie hostages 75% faster.
Ace (3 pt): Increases your supply of cable ties from 2 to 6.
Mechanics[]
Player can tie down civilians, and civilians only, by interacting with them while standing next to them. Civilians must be intimidated into lying down first by shouting at them or making noise with Control Freak skill. Tying down a civilian takes 2 seconds without this skill and 0.5 seconds with the basic version owned.
Tied civilians cannot move and, hence, cannot use their phones or panic buttons to raise the alarm. If a camera or any person spots a tied civilian, they will become alerted and attempt to raise the alarm.
Law enforcement will spend time and effort trying to free civilians. Tied civilians delay the assault waves. They can also be traded for players in custody between assault waves.
To tie a civilian, player needs to have at least one cable tie left. The cable tie is used up upon finishing the action and cannot be retrieved even if that civilian is subsequently killed or freed.
Strategy[]
The basic form of this skill is not very useful on its own; with only two cable ties, it saves you only three seconds in total. Consider not getting it until you're ready to get the aced version as well.
The aced version is useful in two circumstances.
In heists (banks and jewelry stores) done during stealth, having a large number of cable ties may allow the team to tie down all the civilians in the shop. This removes the need to have someone nearby to intimidate the civilians on a regular basis to keep them from phoning for help and setting off the alarm. However, in such heists where civilians are close together, keeping them suppressed is typically easily done. The usefulness of additional cable ties in this case depends on how many civilians appear in areas outside the main area of the shop, such as on the street or in back rooms.
On loud heists, the aced version allows getting a much larger number of hostages and moving them to an area where they are not easy for law enforcement to free. This can considerably slow attacks by assault waves, making defense much easier.
To summarize, this skill is of particular value when:
One is not playing with a full party (bots can't use cable ties), especially solo;
When there are large number of spread-out civilians to keep track of (Mallcrasher, Nightclub, Diamond Store, GO Bank);
When full control without constant attention is desired.
The alternative to the skill is simply to kill the civilians, especially with Winston Wolfe aced to reduce the cleaner cost by 75%. This offers several advantages: it is done instantly, can be done at range and allows the body to be bagged and moved to a less visible location (as hostages often do not follow the heisters to their exact location), which is useful for stealth. The only disadvantages here are the cleaner cost (even if reduced with the aforementioned skill) and limited supply of body bags. When players first start playing, they have very little money compared to what they need to buy skills, weapons, mods, etc. Low-level heists also offer little reward and comparatively big cleaner costs. However, as players move through levels, the money problem becomes much less of an issue especially on heists with high payouts.
Thus, this skill may be of use to starting players who do not wish to cut on their income by killing civilians and often try to complete any of the establishment-robbing maps stealthily, especially when they do not have a full party or are playing solo.
Trivia[]
Example of the pre-patch "10 cable ties" effect.
Before a patch that reduced the maximum cable tie count to 6, Cable Guy Aced used to give players 8 extra cables, up to a maximum of 10.
The full effects of Endurance became a default gameplay feature.
Endurance
Mastermind
Tier 1
Basic (1 pt): Increases your stamina by 100%.
Ace (3 pt): Increases stamina for you and your crew by 50%.
Mechanics[]
Learning the basic version of this skill increases this value by 100% for a total of 200%. For example, a Two-Piece Suit would provide 42 stamina to the player inside of 21. Learning the aced version increases any armor's stamina to a total of 250% for the owner (and anyone else with basic Endurance) and 150% for team-mates without this skill. Bonuses from multiple players' aced Endurance do not stack.
Strategy[]
Any map, team or playstyle can benefit from running. Default stamina of a player leaves a lot to be desired even on small maps. Taking the Basic version of this skill helps immensely and can be enough, depending on your preferred activities and maps. The Aced version costs 3 points and adds 50% to the overall stamina, and that bonus can be provided by another player. Sprinter skill may be a better investment since it both helps with stamina (although differently) and increases speed (Aced version). The speed bonus helps with running as much as with stamina: you can cover more distance in less time with the same amount of energy spent and left. These two skills complement each other well.
Leadership's basic effects were removed from the game, while its aced effects were tweaked and moved to the basic version of Stable Shot.
Leadership
Mastermind
Tier 2
Basic (1 pt): You and your crew's weapon stability with pistols is increased by 4 points.
Ace (3 pt): You and your crew's weapon stability with all weapons is increased by 8 points.
Mechanics[]
The basic version of Leadership reduces the player's pistol recoil by 4 points. Acing the skill decreases the recoil of all weapons by 8 points. If more than one player has this skill, the effect will not stack.
As of Update 46, this skill's stability increase now properly applies to Akimbo weapons.
Strategy[]
Obviously, if the player intends only to acquire the basic skill, they should incorporate pistols into their regular weapon loadout. This skill synergizes nicely with other pistol-improving skills, such as Gunslinger, Equilibrium, and Pistol Messiah.
Acing the skill is recommended as not only is it cheap and low-tiered, but also confers a handy bonus to recoil reduction that applies to all weapons, not just pistols alone.
Control Freak's basic affects were moved to the basic version of Stockholm Syndrome, and its aced effects were moved to the aced version of Sixth Sense.
Control Freak
Mastermind
Tier 2
Basic (1 pt): Civilians remain intimidated 50% longer. Noise created by you intimidates civilians.
Ace (3 pt): Unlocks special Inside Help assets in the Job Overview menu.
Mechanics[]
Control Freak allows you to cause civilians in a large area to cower on the floor by making noise, be it from unsilenced gunfire or explosions. It essentially works as a wider, non-directional version of shouting, preventing civilians from getting up and raising alarms or calling the police.
While the specific range is not specified, the intimidation radius is as large as the noise created. Each weapon has their own noise range, however in general most weapons will cover the central areas of any map once heisters have taken care of any wandering pedestrians.
Note that drills placed by a heister with Control Freak do not generate intimidating noise - civilians are suspicious of drills they can see but do not consider the sound of a drill to be suspicious or dangerous.
You do not have to see the civilians for them to be intimidated, allowing for easier and quicker crowd-control. Like shouting, civilians need more than one interaction in order to lay down. The first sound will make them stop running (or do the panic animation), and a second will make them lie down. Automatic weapons are exceptional at placing civilians under control. Note that the noise alerts created by firing a weapon have a cooldown of 1.5 seconds. During this time, additional alerts will not register and will not have any effect on civilians. [1] Because of this, players should fire one round at a time; there is no use in spraying bullets indiscriminately.
Additionally, do note that the intimidated civilians will require repeated noise to keep them down. To do that, keep creating noise at regular intervals to keep them intimidated. Once the civilians are controlled at least 45 seconds can pass between gunshots, meaning that almost any reasonable concealment weapon can maintain crowd control for over half an hour.
Strategy[]
Control Freak is very valuable for players who need to control the area quickly. This is particularly valuable in civilian-heavy stealth heists like Bank Heist and Jewelry Store.
By simply firing off bullets in any direction, civilians will quickly be frightened and get down, allowing the heisters to subdue them without going through the lengthy phase of shouting at them, even allowing you to keep them down without using cable ties, or standing in their general vicinity. This can also be useful for preventing civilians from getting up during a firefight and risking their lives in the crossfire.
Most usefully, the OVE9000 saw can be used to create noise without using ammunition simply by aiming it away from any objects. The combination of Control Freak and the saw is particularly useful on Bank Heists, where it can ensure crowd control of the entire bank area while sawing open deposit boxes inside the vault.
The aced version of this skill comes from the original Inside Man skill and, as it says, unlocks various assets in the Overview menu. These assets range from Expert Driver (eliminates chance of an Escape mission) to an extra keycard on various heists.
Note that Control Freak is arguably a hinderance on Mallcrasher as panicked civilians will not flee from the shops, meaning that heisters must choose between throwing in a grenade and accepting the cleaner costs, tying the civilians and moving them as hostages or carefully shooting/meleeing each item of value.
Spotter's basic effects were moved to the basic version of High Value Target and its aced effects were moved to the aced version of Sixth Sense.
Spotter
Mastermind
Tier 3
Basic (1 pt): Special enemies marked by you take 15% additional damage.
Ace (3 pt): Unlocks the Spotter asset in the Job Overview menu. During stealth the Spotter will highlight guards for you and your crew.
If stealth is not an option, the Spotter will highlight special enemies for you and your crew.
Mechanics[]
The basic benefit of the skill is straightforward and very helpful in combat: any special enemy highlighted by you will receive 15% more damage from crew members, including yourself. Targets marked by the Theia Magnified Scope are also susceptible to receive 15% more damage.
The aced benefit of the Spotter skill unlocks the ability to hire an off-site spotter for certain heists to mark enemies near windows and/or the exterior area of the map, during the stealth phase. The "spotter" manifests itself in the form of a single stationary point somewhere on the map. This point can be, and often is, floating in midair. Whenever the "spotter" point has line of sight to a guard's detection point, which is located in the head (which must also be visible in order to mark guards in stealth), said guard will be flagged. Spotters are invisible and have a 90-degree field of view. On some maps, there are actually two "spotter" points located on the map, such as on Firestarter day 2. [1]
The spotter asset is largely situational, although still beneficial for the entire team. For players who do not prefer long stealth missions, the 3 points invested is of little use and best put into other skills that would benefit them better in combat. Conversely, stealthy players would find the off-site spotter invaluable for their heists.
After Update 39, the Spotter became more useful in loud heists as the spotter would now highlight special enemies instead of simply disappearing.
Acing the Spotter skill also enables purchasing of the Spycam asset during the pre-planning mode of Big Bank, Framing Frame Day 1, and Art Gallery.
Strategy[]
Not a lot of strategy is involved with the Spotter skill, simply press your shout button (the "F" key on PC, by default) to highlight any special enemy you see and they will receive additional damage.
Trivia[]
This skill was added in Update #25 of the game, replacing Smooth Talker and inheriting the former's ace effect while turning its basic effect into a regular gameplay mechanic.
The spotter seems to utilise a side-to-side "sweep" mechanic, in which guards are slowly detected from left to right. After the the outline of the guards have disappeared, the guards are then slowly detected from the right to the left and the process repeats.
Dominator's basic effects became a default gameplay feature and its aced effects were moved to the basic version of Confident.
Dominator
Mastermind
Tier 3
Basic (1 pt): You can now intimidate a non-special enemy into a hostage. Less well trained enemies are easier to intimidate.
Ace (3 pt): The power and range of your intimidation is increased by 50%.
Mechanics[]
With Dominator, pressing the interaction key while looking at an alerted enemy has a chance to threaten him into submission. The chance of this happening can be increased via factors in combat, such as how low the enemy's health is or whether or not the enemy is reloading.
The amount of enemies that can be dominated is equal to how many players have the Dominator skill (for example, if two players have Dominator in a four-player lobby, two enemies can be dominated). Players in custody will not affect this amount, whether or not they have the skill. Additionally, only players with the skill can dominate enemies, though players without the skill can help with further intimidation after the enemy has raised his hands.
A dominated enemy becomes a hostage until freed, killed, or converted.
Special enemies cannot be dominated from the use of this skill.
Having the basic skill allows for domination of enemies, though the chance of success is rather low at first. This can be remedied by certain skills. The chances of one surrendering also varies based on the type of enemy one is shouting at. A security guard is more likely to give in than an FBI agent. One additional law enforcer can be intimidated for every player on the team that possesses this skill.
The target enemy will vocally announce his surrender if the domination attempt is successful. If he doesn't say anything, then the shout didn't work. Once a guard has entered the animation in which he has his hands up, any player can then shout him through into the surrendering and cuffed stages.
Major factors in successfully intimidating a law enforcer or guard include;[1]
Passive intimidation level increases massively increase the effectiveness of this skill
Whether the officer is alert and has their weapon drawn; if shouted at within 1.5 seconds of becoming alerted, domination success is almost guaranteed
Tougher opponents such as FBI Agents and Murkywater PMCs have a ~20% chance to resist even if caught in this phase, gangsters and GenSec guards (the ones dressed in red and wear berets) will always resist
Health; intimidation success chance increases as victim health decreases, up to certain limits depending on the enemy type (highest when below 65 to 50 percent of maximum health)
Distance; intimidation chance increases when the dominator is closer to the victim (highest when within 3 meters)
Angle/Position; intimidation chance increases when the dominator is flanking the victim
Squad; if the victim was spawned as part of a team and no members of that team are within 8.5 meters (either due to death or separation), they are easier to intimidate
The "Weapon Down" state; if the victim is reloading, or playing a medium or heavy pain animation, they are easier to intimidate
The victim is not considered to be in the 'weapon down' state if they are diving prone from suppression (see #9)
High knockdown weapons have a very high chance to cause medium/heavy pain reactions, making the Telescopic Baton and Ding Dong Breaching Tool exceptionally effective for intimidation
Initial intimidation attempts: after the first attempt, they are more vulnerable to successive intimidation attempts for the next 5-9 seconds - the more attempts occur within this period, the easier they are to intimidate
However there is a 5-10 second window after the first window expires, during which an enemy will always resist; attempting to intimidate them again simply extends this window (potentially indefinitely)
Violence; shooting at (or hitting) a potential victim temporarily increases their chance of resisting to 100% for two seconds, in most cases. Sometimes this factor may be ignored if the target is knocked down by a melee weapon then immediately intimidated.
All of these factors are considered together and have a combined effect (up to a certain point). For instance, attempting to intimidate an enforcer from behind whilst more than three meters away will have less chance of succeeding than if you stand right behind them and attempt to intimidate them whilst they are in the middle of reloading.
Note that as of Update #25, dominating guards whilst in Stealth requires the crew to answer their pagers, even if the guard is left alive. Once the pager is answered, the guard can be killed without further repercussions and without risk of an additional pager check; in fact, the guard can even be killed before or during answering the pager without sounding the alarm. One shout (instead of three as in loud) within 1.5 seconds of them becoming alert will have a very high chance of the guard immediately cuffing themselves.
Keep in mind that due to networking behavior, a law enforcer may start surrendering on one player's screen but not appear to surrender to another player. Exercise caution if you know another player is capable of intimidating. Clear team communication can be essential to successfully taking captives in hectic, close-quarters combat - especially since the audio cue can be difficult to hear over everything that's going on. Also, paying attention to the number of hostages indicated by the HUD can also greatly help; if the number increases and one is sure no one is tying down a civilian, then a law enforcer has surrendered.
After taking captives, it is also important to note that they do not receive any kind of protection or even restored health - and unlike civilians, they cannot be relocated. Care must be taken to avoid accidentally killing them, especially if you are waiting to release a teammate from custody and have no civilian hostages.
Standard Capture Technique[]
The following guide will lay out how to efficiently and reliably capture law enforcers by focusing on the main intimidation multipliers. Be sure to have Dominator Aced to significantly increase your base intimidation chance!
Step 1: First, isolate your target. Ensure there are no other law enforcers within a few meters, as they may interfere with the capture attempt, either via the squad modifier or simply attacking you.
Step 2: Once the target is suitably isolated, stun them. Here, you have two main options;
High-knockdown weapons like the Baseball Bat or Telescopic Baton are ideal. Martial Arts Basic also helps when taking this approach, as it increases effective knockdown.
The Buzzer also works well here given its ability to stun enemies; a stunned/tased enemy has a very high chance of surrendering.
Step 3: Once the target is prone (this may occasionally take two or three hits) or once they are shaking from being tased, quickly circle around behind them. This gives the violence cooldown time to expire, and also enables the flanking bonus.
Step 4: Before the target has had time to fully stand up or whilst they are still shaking from being zapped with the Buzzer, shout at them from behind.
Assuming you followed all of the steps correctly, the target should begin to surrender almost immediately. If they don't, you're in the perfect position to quickly get rid of them and try again with a new target.
One thing to note is that this technique obviously requires that you can actually flank the enemy, and given the concentration it requires (as opposed to just shouting indiscriminately) you will likely want to have your teammates watching your back. Making sure they don't interfere unless also trying to intimidate the target (a stray shot could restart the violence timer, for instance) is also important.
Occasionally, circling around behind an enemy may be impossible (due to terrain). Don't be discouraged - there's an upper limit to surrender chance and not every modifier is needed to make it reach that point, so you may not even need the flanking bonus in order to get an enemy to surrender with this approach.
Bugs[]
A heister in casing mode can dominate guards in stealth if shouted at within the standard 1.5 second window, so long as they became alert to anything other than the unmasked heister (which would automatically mask them up if detected). However the heister must be able to mark guards in casing mode with basic Chameleon; "marking" them as they become alert will dominate them instead, without playing the heister's voice line.
Successfully dominating a rappelling enemy will cause him to teleport straight to the ground and surrender.
Occasionally when executing a dominated guard, they will appear to fire off their weapon during their death animation. While gunshots will sound, it will only be audible to players and not other NPCs nearby; this is due to them technically being alert as they die and triggering the 10%~ chance of discharging their firearm.
Lag may cause a full domination to require less than three shouts if the shout button is pressed rapidly enough.
This bug can also work in the opposite way, with a law enforcer requiring up to six shouts after surrendering before they cuff themselves.
Trivia[]
A Dominated Taser.
When the game was first released, Dominator only allows for one dominated enemy at any time. A recent update enabled all crew members with the skill to dominate an enemy, up to a maximum of 4.
A player can shout at an enemy even without the skill. It won't work, obviously, unless at least one player on the team has this skill.
The same thing applies to shouting at special enemies, with the skill or not, though Tasers may somehow react to the shout and may attempt to sidestep away from the player's crosshair when shouted at.
(Pre-patch) Tasers, due to a very rare bug prior to the Christmas 2013 update, were susceptible to Domination attempts. However, they could not be converted. This was patched when GO Bank was released.
Your choice of weapon and protective equipment have absolutely no influence on intimidation chance. A KSP is no better than a Gruber Kurz when it comes to taking captives.
There is an unused script which allows special enemies to be dominated, suggesting that Overkill could have planned to implement such a skill. However, as the script is unused, special enemies remain unable to be dominated unless the game is modified to make use of the unused script. The script is present in the game files without any modifications involved.
If aim assist on console is activated the player will target dominated law enforcers if they are aiming close to one. The same applies to converted law enforcers.
In the early versions of the game and on consoles, the dominated law enforcer had their hands behind their heads without visible handcuffs once dominated. In the updated versions, they have their hands on their back with visible handcuffs.
When the game was initially released, dominating guards in stealth worked like in loud, and didn't cause a pager alert, allowing people to dominate 4+ guard maps, easing stealth in most instances. This got changed when stealth was overhauled to be less forgiving, allowing an instant-conversion in stealth, but still needing to answer a pager for doing so.
The domination audio cues still follows the scripting order of PAYDAY: The Heist (surrendering and dropping weapon on the first, kneeling on the second and cuffing on the third), despite the process being reworked in the sequel.
It's possible for a player to dominate two law enforcers at once when they are close to each other.
Hurting a dominated law enforcer in stealth will often cause him to yell "Cover me!" or call for help, though this will not alert any guards or civilians.
While the skill's name remained, its effects changed completely.
Stockholm Syndrome
Mastermind
Tier 4
Basic (4 pt): Nearby civilians have a chance of reviving you if you interact with them.
Ace (8 pt): Civilians reviving you have a chance of giving you ammunition.
Mechanics[]
"You're on the wrong side of the law but, you have my sympathies…"
—A civilian reviving a player.
When shouted at, nearby civilians who are not tied down will attempt to revive the player. The amount of ammunition received from the aced version of the skill is the same as the ammo drop from killing one law enforcer.
The civilian reviving the crew is not targeted by law enforcers, thus ensuring an uninterrupted revive. However, the player on the ground is still presented as a target and will be shot at unless fully incapacitated.
As Dominator Aced increases the distance from which you can shout with civilians, so too does it increase the distance that you can use this skill.
Strategy[]
Because this skill does not work with civilians who have been cable tied, it works well with Control Freak, which prevents civilians from running too far away while leaving them available to revive the player. However, it is often preferable to keep some hostages tied, as having a hostage delays assault waves and allows players to be traded out of custody. Swan Song is a good supplementary skill to Stockholm Syndrome as it gives the player a few seconds to move closer to a viable civilian before being downed.
For its heavy skill point investment, this skill (especially the aced version), is not especially powerful. Revival can be more readily assured with skills such as Pistol Messiah or Inspire, and extra ammunition is available through a number of enforcer skills, such as Fully Loaded.
It is also highly situational, almost too situational, to be truly effective: civilians are generally present on stealth-centric maps only, during which one may not even take damage, much less getting shot down to be saved; even if one manages to be incapacitated, an untied civilian may not always be available due to many reasons (too far away, calling the police, having fled the scene, etc...).
Arguably, this skill would come in handy during a stealth attempt gone wrong, but seeing as players would rather restart the heist/day entirely when this happens than going loud, it may not see much use. Outside of conventional heists, escape scenarios are some of the few places where this skill could shine, especially on higher difficulties or when the crew is scattered and cannot regroup in time to save a downed heister, though whether it can be used or not depends largely on the scenario being played at the time.
Kilmer's basic effects were revised and moved to Aggressive Reload, the aced version's accuracy-increasing effect was altered and moved to the aced version of Rifleman, and its reload-while-sprinting effect was moved to the aced version of Parkour.
Kilmer
Mastermind
Tier 5
Basic (4 pt): Increases your reload speed with assault rifles and sniper rifles by 25%.
Ace (8 pt): Your weapon accuracy while moving with assault rifles and sniper rifles is increased by 50% and you can now reload your weapons while sprinting.
Strategy[]
This skill sees extensive use if one has a sniper rifle or assault rifle as their preferred primary. The basic version of the skill augments the reload speed of those weapons by 25%, thereby reducing the amount of time one has to spend reloading their weapons in combat, making them less vulnerable to enemy fire and allowing one to retaliate sooner. This skill is beneficial to all manners of assault/sniper rifles, as it speeds up the slow-reload ones (Thanatos .50 cal) and making the fast-reload ones (Falcon) even faster.
However, the Ace effect of Kilmer is only useful if one spends most of their time in combat running around the combat zone as it reduces the radius of the bullet spread induced by movement by 50%. Furthermore, it also comes in handy only if one sprints around when they reload (i.e. topping off when fleeing from a fight; dodging incoming bullets; etc.), otherwise it is unnecessary to have.
It is worth noting that, unlike the Man of Iron skill in the Enforcer tree that bears similarities to Kilmer, the Mastermind skill will not affect or change the look or manner of which a player sprints.
Trivia[]
The skill's name is likely a reference to American actor Val Kilmer, who starred in the crime film Heat in which he can be seen reloading his assault rifle only once during the bank heist fire fight.
As of Update #39, this skill has been moved from the right side of Mastermind's tier 5 to the left. It was replaced by Partner In Crime and it replaced Black Marketeer. This change has no effect on gameplay.
Gunslinger's basic effects were moved to the aced version of Desperado, and its aced effects were split into the basic and aced versions of One Handed Talent.
Gunslinger
Mastermind
Tier 5
Basic (4 pt): You reload pistols 50% faster.
Ace (8 pt): You deal 15 additional damage with pistols.
Mechanics[]
The basic version of Gunslinger speeds up the player's reload speed with all pistols by 50%. Acing the skill gives all pistols +15 damage.
As of Update #46, this skill now applies to Akimbo weapons, but the damage increase is halved (+7.5 damage) to account for the fact that Akimbo Weapons are fired twice, while most other weapons are fired once. Damage on the Inventory screen seems to reflect the damage done, per shot, per one pull of the trigger.
Strategy[]
Gunslinger aced provides the Mastermind with one of its most crucial offensive skills. This skill's pistol damage boost obviously makes pistols the weapon of choice for Masterminds. With a sufficiently high damage pistol, such as the Deagle or Bronco .44, this skill allows single headshots to be lethal against virtually all standard law enforcement agents. On Death Wish, where only the most efficient builds are viable, this skill gives Masterminds enough of an offensive edge that pistols can be used as moderately effective secondaries. This skill synergizes very well with Pistol Messiah, as it guarantees high enough damage that kills can be reasonably obtained while in bleedout mode. Equilibrium may also be a worthy investment, maximising pistol effectiveness by increasing swap speed and rate of fire.
The skill also stacks with the Ghost tree's Silent Killer skill. By using the Asepsis Suppressor, which does not give any damage penalties, albeit at the cost of accuracy and stability, one can effectively almost double the damage of their handguns.
Trivia[]
The Bronco .44 is featured in the skill's icon.
The undeveloped skill tree for last generation consoles still have a +50% damage increase, but do not have a higher base damage to pistols that was increased to balance the changes to Gunslinger on PC.
Pistol Messiah was renamed to Messiah, considering all weaponry was now allowed to trigger it, massively changing its functionality.
Pistol Messiah
Mastermind
Tier 6
Basic (4 pt): When in bleedout, you are instantly revived if you kill an enemy with a pistol. You only have 1 charge. You will replenish your charge when you get out of custody.
Ace (8 pt): You gain an additional 2 charges. You will replenish your charges when you get out of custody.
Mechanics[]
Players start every day with 1 charge (3 if the skill is aced), and can only replenish them by finishing the day, or by escaping custody. By killing an enemy with a single pistol when incapacitated, players with at least one charge will instantly revive themselves with the appropriate amount of health. The ability only works on hostile NPCs; killing a converted enemy or civilian does not activate the ability.
The skill works on all enemies as long as a pistol is used; though significantly harder, players can even self-revive by killing special enemies (such as a Bulldozer). However, the skill requires the player to use their weapon, meaning it cannot be used when kicked down by a Cloaker or electrocuted to unconsciousness by a Taser.
As of Update 46, this skill can now be triggered with Akimbo pistol weapons but only if Die Hard has been obtained.
Strategy[]
Unless you have fired while in bleedout, enemies will not fire at you, so waiting for the right opening is key. Bulldozers are an exception to this; they will fire at players in bleedout at all times.
Even if the skill is aced, you can only refill charges by entering custody, so use them wisely; if one or more teammates are nearby and handling hostiles, save your charge for later. For that reason, it's highly recommended players buy the Enforcer's Die Hard skill to allow primary weapons when downed should players wish to cover allies instead of reviving themselves (and in doing so, save a charge for later use).
It is important to remember that a self-revive can prevent failure under the right circumstances, especially if the rest of the crew is down. Furthermore, in public games, it is possible that less-skilled players would be less willing to revive you. Thus, players should consider this skill if they decided to spend most of the time in public games, as well as any harder and Pro heists. Additionally, this skill combined with the Inspire aced skill can be very useful if other members of the crew are down and you are able to revive yourself.
A major drawback of this skill is that it requires one to explicitly use a pistol during bleedout, thus restricting the player's available loadout and (potentially) their overall power. Because of this, it would be advisable to also get the pistol buff skills from Mastermind, such as Gunslinger and Equilibrium. Also of interest is the Aced version of the tier 1 Technician skill Nerves of Steel, as it allows the use of sights while in bleedout. A skill also worth considering is Silent Killer, as in combination with a high-damaging pistol and a suppressor with a low damage penalty (or none at all), a player should have little difficulty killing an enemy while downed.
Pistol Messiah can also work on dominated law enforcement officers. This should only be used as a last resort, if enemies are not present or too far away for whatever reason.
Trivia[]
When using a Pistol Messiah charge, it will not apply revival skill bonuses.
Oppressor's effects were fully removed from the game.
Oppressor
Enforcer
Tier 1
Basic (1 pt): Your weapons are 25% more effective at threatening enemies.
Ace (3 pt): Your weapons are 50% more effective at threatening enemies.
Mechanics[]
This skill increases the Threat value of suppressive shots fired from the player's weapons during combat.
Note that threatened units will gain a resistance to it after they recover. This means that suppressing the same group of enemy is not recommended, engaging in a long-standing stand-off will render your targets close to immune to its effect.
Do note that special enemies other than snipers do not calculate threat, and therefore are immune to its effect.
When using the Muscle Perk Deck, Disturbing the Peace will use the Threat score to determine if enemies enter a state of panic.
Strategy[]
This skill makes weapons with a high Threat rating trigger the "suppression effect" on law enforcers much more often. Weapons with a mediocre Threat score are greatly complemented by Oppressor. However, weapons with higher amounts of threat (i.e Sniper Rifles) or with excessive fire rate (i.e. Light Machine Guns) do not benefit much from this skill, for they already cause, on average, a significant amount of suppression.
At Basic, the maximum Threat of all weapons is capped at 50, and at 75.3 when Aced. Should the player rely consistently on this skill, it is advised on pairing it with weapons that have a Threat rating of at least 20; enough to keep suppressing opponents, so long as the player shoots once per second. The same effect can be achieved with a 40 Threat weapon one shot every 2 seconds. Usually, mods that increase damage, most commonly Barrel Extensions, will also increase threat and vice versa, but this is not directly connected.
Threat is a value that is related to the "noise" report from the gun, so silencers will severely hamper the suppression effect and range.
Trivia[]
Spinning an OVE9000 in the air will not suppress nearby enemies, but sawing the ground near them will.
Bulletstorm's effects changed radically, totally changing the use of the skill.
Bullet Storm
Enforcer
Tier 1
Basic (1 pt): Directly after you deploy an ammo bag, you can fire your weapon for 5 seconds without depleting your ammunition.
Ace (3 pt): You can fire 10 seconds longer without depleting your ammunition.
Mechanics[]
This skill allows the player to literally dish out a bullet storm. Upon deploying an ammo bag, the player is immediately given 5 seconds of infinite ammo to use, similar to the effects of aced Swan Song. After those 5 seconds, the weapon's magazine will begin depleting. Acing the skill will add an additional 10 seconds to this period.
Strategy[]
While a strong skill that can be picked up at a low tier and used to clear many enemies from the vicinity, good strategy must be employed during its use. Priority should still be given to deploy ammo bags at the appropriate moments and a defensible point that the team benefits before considering the effect of this build, as a team will typically require ammo at a good location at the earliest possible instance. The best way to treat this skill is as a bonus for an Enforcer instead of their core playstyle.
Weapons with a high rate-of-fire and/or large magazine sizes benefit greatly from this skill, as they can flush out a monstrous count of damage in the given 5-15 seconds, and still have a full magazine to use once that time is up. It is feasible to use a sniper rifle or single-fire shotgun with Bullet Storm, but the tactical advantage gained is not significant, as they fire too slowly to effectively utilize the short period of time given, so one should try to avoid doing so if at all possible. Shotguns with automatic fire, i.e. the IZHMA 12G, or fast rate of fire, e.g. the Judge, are viable matches with this skill, especially when combined with HE rounds.
For users of the Vulcan Minigun, having Bullet Storm aced is a very useful tool, as it simply allows one to spray it without concern for ammo. It is also part of the method to obtaining the "Oh, That’s How You Do It" achievement, which requires you to fire the Minigun for 25 seconds without releasing the trigger or reloading, and thus can only be done if one has maxed out Bullet Storm.
Die Hard was changed completely and its Basic effects became a default gameplay feature, while its Aced effect was moved to the Basic version of Resilience.
Die Hard
Enforcer
Tier 2
Basic (1 pt): You can use your primary weapon in bleedout.
Ace (3 pt): Your armor recovers 15% faster.
Mechanics[]
The main function of Die Hard is to allow players to wield their primary weapons when entering bleedout mode, which can prove useful when defending an area or providing suppressing fire for a team mate that is occupied with reviving the player.
If Aced, the skill also reduces the player's armor recovery delay by 10%. Once armor suppression is factored in, the actual armor recovery speed boost is merely 8%, or down to 3.7 seconds.
Strategy[]
A player's offensive capability during bleedout mode is often hampered by the low power and/or general unreliability of their secondary weapon (e.g Chimano 88). Having Die Hard enables them to use their primary weapon alongside their sidearm, boosting their bleedout combat efficiency significantly.
Due to the fact that most primary weapons have subpar-to-horrible hipfire accuracy, and by default ironsights are not usable in bleedout, it is recommended that the player has also aced Nerves of Steel to assist with aiming. This, combined with the effects of Aced Tough Guy and Aced Berserker, will allow the player to dish out damage for much longer than usual, giving their team mates ample time (and cover) to help them up or secure an objective in the event that the downed player cannot be saved.
Masterminds may want to consider this skill if they plan on using Pistol Messiah, as they may wish to save their revive charge(s) while still being able to defend themselves should they go down in an area where their teammates can easily reach them.
The aced version of the skill works well when paired with Bulletproof aced, giving the player a 32% faster armour recovery rate, at 3.02 seconds. Having a quicker recovery rate with armors such as the Two-Piece Suit can be very helpful, since the armour's defences will be penetrated rather quickly, leaving a player exposed to health damage. Remember that a player must not be taking damage for this skill to work.
Stun Resistance's full effects were moved to the aced version of Resilience.
Stun Resistance
Enforcer
Tier 3
Basic (1 pt): Reduces the visual effect duration of flashbangs by 25%.
Ace (3 pt): Further reduces the visual effect duration by 50%.
Mechanics[]
The benefits of the skill are straightforward; when a player is blinded by a flashbang, the screen will return to normal more quickly. The duration of the effect also depends on the player's distance from the flashbang and whether or not they were looking directly at the grenade's detonation.
Strategy[]
Flashbangs aren't actual projectiles that gets thrown by enemies. Instead, the game just periodically spawns one at your feet when you're not looking, which is most of the time, and especially so if there is a mass of law enforcers huddling up near the player's position. Due to this, Stun Resistance can be a useful skill for combat-heavy players, as being flashbanged can usually spell death for players who are blinded while the enemy approaches.
Getting either benefit helps, although the basic version is usually enough if one desires to spend skill points elsewhere. Alternatively, one can simply look the other way and/or take cover if they spot a flashbang being spawned into the map before it detonates. With enough practice the skill can be overlooked entirely.
Tough Guy's aced effects were buffed and moved to the basic version of Nine Lives, while its base effects were removed from the game.
Tough Guy
Enforcer
Tier 3
Basic (1 pt): Reduces your camera shake by 50% when you are damaged by enemy fire.
Ace (3 pt): Your bleedout health is increased by 25%.
Mechanics[]
The basic version of this skill increases the steadiness stat of a player's armor, which mitigates camera shake. At 11 steadiness, players receive the default 100% camera shake. At 22 steadiness, camera shake is reduced to 50%, and at 44 steadiness, it is further reduced to 25%, and so on, according to the formula . [1]
The aced version of this skill increases bleedout health from 100 to 125.[1]
Note that this is only the bleedout hitpoints, and it is not related with how long you can stay in bleedout.
Strategy[]
The basic skill will reduce camera shake, so that enemy cover fire will not sway your aim when using sniper rifles, as well as reduce the swing when being meleed. Other than that, the basic skill offers little aid, as the shake from damage, even when using the Two Piece Suit, is low enough that the player can aim with ease.
The Aced version is of questionable use, as players in bleedout do not need to draw fire from their enemies, unless they plan to revive themselves (with Pistol Messiah), or serve as a decoy while an ally is reviving them. Given the skill point cost, and the low increase in hitpoints, the player can do those tasks with the default 100 hitpoints.
Hard Boiled's basic effects were modified and moved to the basic version of Far Away, while its aced effects were tweaked and moved to the basic version of Fire Control.
Hard Boiled
Enforcer
Tier 5
Basic (4 pt): Increases your shotgun weapon accuracy by 20% when firing from the hip.
Ace (8 pt): Increases your weapon accuracy by 20% when firing from the hip with all weapons.
Mechanics[]
Although the description states it increases accuracy, this is a somewhat misleading description. The skill does make the gun more likely to hit the object at which the player is aiming, but it does this by decreasing the spread modifier of the weapon directly, rather than increasing the accuracy statistic directly. With the basic version of this skill, the spread modifier is reduced from 3.5 to 3.3. [1]
Strategy[]
Players should consider carefully before purchasing this skill, especially if they intend only to use the basic version. Increasing the accuracy of a shotgun may make it less useful by tightening the spread of pellets and decreasing the chance of striking many enemies or scoring a headshot. Because shotguns utilize damage falloff, they become worthless after a certain range, dealing no damage regardless of accuracy.
When using the ace version with non-shotguns, the effect is generally beneficial, but minimally useful for such a large point investment. Other skills in the enforcer tree may be more useful in combat than this small boost to a weapon's effective range.
Most of Carbon Blade's effects were modified and moved to the Portable Saw skill, while its offensive capabilities were moved to Saw Massacre.
Carbon Blade
Enforcer
Tier 6
Basic (4 pt): You replace your saw blades with carbon blades, increasing your saw efficiency by 20%.
Ace (8 pt): Attacking enemies with the OVE9000 portable saw wears it down 50% less than before. Saws are 20% more effective. Saw can be equipped as secondary weapon.
"'Watch out! He's gonna slice and dice ya!'"
—A law enforcer's reaction to a comrade being killed with an improved Saw.
Strategy[]
Although the use of OVE9000 as a weapon is risky and hardly advised, the aced version of the skill may be a beneficial asset to a player's build. The basic version can be used to allow sawing of more objects, but there is no map that will use up all of the ammo if backed-up by an ammo bag. The aced version allows using the saw as a secondary weapon, thus retaining most of the players' firepower.
Note that there are other skills, such as Berserker, which can provide similar, if not superior, buffs to the OVE9000 without the heavy skill point investment required to ace this skill.
Trivia[]
While the skill's name suggests the usage of saw discs made from carbon fiber, this is not technically plausible in reality as carbon fiber edges wear very quickly when grinded against a hard surface. It could, however, be a technical misnomer of "Carbide" saw blades, which are composed of carbon-heavy metal compounds.
It is possible to equip the primary and secondary saw at the same time, although the only benefit of such setup is the slightly larger starting saw ammo pool.
Man of Iron was renamed to Iron Man, and its Basic effect moved to its Aced effect. Man of Iron's Aced effect was split and moved to the Aced versions Shock And Awe and Lock N' Load.
Ace (8 pt): When you melee Shield enemies, they get knocked back by the sheer force. Run and shoot – you can now shoot from the hip while sprinting.
Mechanics[]
Purchasing the basic level of this skill immediately unlocks the Improved Combined Tactical Vest for the player to use, free of any additional charge. This armor has a base capacity of 170 points, which is the highest in the game.
The aced version allows players to knock back Shields with a melee strike, forcing them to pull their shields back and exposing them to gunfire. It also allows the player to fire their weapons while sprinting.
Strategy[]
The Improved Combined Tactical Vest works very effectively with the Berserker skill, as it allows the player to have low health (thereby increasing damage), yet retain very high survivability.
Since the introduction of sniper rifles with the Gage Sniper Pack and specialized Ammunition types with the Gage Shotgun Pack, the aced version of this skill has become significantly less useful. While it was formerly one of the easiest ways to incapacitate a Shield, they can now be executed with almost total safety from a much longer range, without placing the player within hazardous melee range. It is useful if neither weapons are available and can provide an opening for shotguns without explosive or AP slugs in close combat where collateral damage puts the team at risk.
However, the addition of the ability to sprint and shoot simultaneously does make acing the skill feasible in some scenarios. It synergizes with shotguns due to their run and gun playstyle and when paired with Overkill can allow the player to mow down crowds of enemies running to an objective or a fellow heister when mobility is of the essence. The ability to sprint while firing synergizes well with Kilmer to allow player to reload and shoot with greater accuracy while sprinting with assault rifles. If the player chooses to wear a lighter armor, Sprinter aced will give a dodge bonus, and Moving Target may offer somewhat increased mobility. With an optimized build, it's possible to get Iron Man aced, Sprinter aced and either Kilmer or Moving Target aced. Shinobi and Sprinter will also increase movement speed.
Xbox 360 and PS3 players may want to invest some points into the Ghost skill tree to unlock the Tier 4 bonus, which reduces movement speed penalty with armour equipped. The in-game description says it does so by a factor of 15%, but in reality it is a 25% buff.
Demolition Man's basic effects became a default gameplay feature, and its aced effects became part of the basic version of the Jack Of All Trades skill.
Demolition Man
Technician
Tier 1
Basic (1 pt): Adds 1 more trip mine to your inventory.
Ace (3 pt): Decreases your trip mine deploy time by 20%.
Mechanics[]
The deployment time reduction does not apply to C4/shaped charges, so the aced version of this skill is helpful only when using the trip mines aggressively against enemies as a means of area denial.
Strategy[]
Any heister using trip mines should take the basic version of the skill.
The aced version is of relatively limited benefit as it only affects the deployment of trip mines (not shaped charges, see above) and therefore is only really of value when using trip mines to defend chokepoints while under fire. If aiming for a trip mine build it may be worthwhile to ace Demolition Man, otherwise the other two tier 1 Technician skills (Nerves of Steel and Rifleman) are probably better choices.
Trivia[]
The name of the skill is a reference to the 1993 science-fiction film Demolition Man.
Nerves of Steel's basic effects were moved to the basic version of the Die Hard skill, and its aced effects became a default gameplay feature.
Nerves of Steel
Technician
Tier 1
Basic (1 pt): You take 50% less damage while interacting with things.
Ace (3 pt): You can now use steel sight while in bleedout.
Mechanics[]
While the player is interacting with an object (i.e., when the interaction circle is visible), damage taken will be reduced by half. The aced version allows players to aim down their sights (even if a custom sight is equipped, contrary to the description) while in bleedout. However, if the player takes too much additional damage while in bleedout mode, they will still become unable to use their weapon, as usual.
Strategy[]
The basic version of this skill can be very useful in loud heists because it can be detrimental to the heist to have to stop interacting with a lock or a drill in order to ward off attackers. This skill reduces the need to deal with law enforcers immediately, allowing players to save time and complete their interactions without distraction. This synergizes exceptionally well with builds focusing on high armor values, enabling the player in question to complete even long interactions without taking health damage. Perhaps most importantly, the bonus is active while reviving downed players.
The aced version of the skill can be useful for covering a team mate who while they revive the downed player, in particular making it easier to kill snipers whilst in bleed out. The effect is most noticeable when using pistols as accuracy is more important than when using SMGs or shotguns.
Aced Nerves of Steel also works well in combination with Die Hard from the Enforcer tree (to allow the use of sights on a primary weapon while in bleedout) or with Pistol Messiah from the Mastermind tree (to make it easier to kill enemies while downed and therefore revive oneself).
Combat Engineering was changed completely and its original effects became a default gameplay feature.
Combat Engineer
Technician
Tier 2
Basic (1 pt): Allows you to turn trip mines on or off.
Ace (3 pt): Upgrades your trip mines with a sensor mode (by replacing the "off" mode). Guards and special enemies that go past your trip mines while in sensor mode are highlighted for you and your crew.
Mechanics[]
Turning off a trip mine will simply disable the visible red laser protruding from the explosive charge. Law enforcers moving in close proximity to the mine will have no effect; the mine will will not detonate. However, if shot at or caught in the explosion radius of grenades, the trip mine will explode as usual.
Trip mines active in sensor mode will have a laser protruding from them, but this laser is blue instead of the default red. Law enforcers passing through this laser will cause an audible tone to play briefly. Law enforcers passing through the beam of a trip mine in sensor mode will not detonate the explosive charge, nor would they be alerted, though the charge can still be activated by stray gunfire or through the use of grenades.
Note that activating the trip mine's sensor mode before the trip mine has been fully deployed will cause the trip mine to divert back to its primed version. A player would either need to reactivate the mine, or wait for the mine to be fully deployed.
Strategy[]
Though this skill has limited use in loud situations, it can be used to great effect on stealth heists, such as Framing Frame. A trip mine in sensor mode can be placed in the path of a guard patrol to alert players if there is a guard nearby. Framing Frame, especially day 3, can realize the full benefits of this skill because guards maneuver in tight spaces and frequently double back, which can surprise or pin down the player. On Death Wish, this skill gains additional benefits on Framing Frame because guards do not carry flashlights, making it exceptionally easy for guards to take the player by surprise.
In loud, the skill still has some use, as they can act as mini-Spotters in tight spaces like the Big Bank vault area. They can be used to warn the team of incoming Specials, giving the team more time to prepare and not get caught off-guard by a Cloaker or even a Bulldozer. In smaller areas, one or two sensor mines are sufficient, though in larger maps not even six is enough.
The Sentry gun deployable became unlocked by default (though the mechanic of requiring a skill to unlock a sentry gun was reintroduced in the Engineering skill), and the aced effects of this skill were moved to the aced version of Eco Sentry.
Sentry Gun
Technician
Tier 3
Basic (1 pt): Unlocks the sentry gun for you to use.
Ace (3 pt): Your sentry gun gains 150% more health.
Mechanics[]
"Fucking Sci-fi robot guns!"
—A law enforcer upon seeing a sentry gun.
The basic version of this skill unlocks the sentry gun for use, an automated defense turret, which can be deployed once in a heist that will function until it is destroyed or it runs out of ammunition. The aced version increases the sentry gun's health by 150%, allowing it to soak up more gunfire before failing.
Without further upgrades, the sentry gun is quite inefficient at killing enemies. It is too underpowered and too inaccurate for later levels. The basic sentry gun is useful as a distraction, as police units tend to focus on the sentry gun rather than the players when the gun is active.
Strategy[]
Players wishing to use the sentry gun will likely need to invest a large number of skill points into its upgrades in order to make it feasible to use in combat. The various upgrades to the sentry gun are almost necessary for it to perform well on higher difficulties, as its most basic form is feeble at best.
The aced +150% HP upgrade is very invaluable in making the sentry gun into a viable distraction unit at starting levels, where later upgrades are still unavailable. While it is still valuable at the end-game, for players wishing to save on points, it is best to ignore the aced upgrade and instead invest in the aced version of Sentry Combat Upgrade for the shield upgrade, which makes the sentry gun invulnerable from the front. With careful positioning, it is very unlikely that the sentry gun will take any significant damage while it is still active, negating the use of additional health.
Tactical Mines's basic effects were buffed and moved to the basic version of Combat Engineering, and its aced effects became part of High Value Target.
Tactical Mines
Technician
Tier 3
Basic (1 pt): Radius of trip mine explosions are increased by 30%.
Ace (3 pt): Special enemies marked by your trip mines take 15% more damage.
Mechanics[]
Tactical Mines provides a 30% boost to mine explosion radius, acting as a slighly better version of the (now removed) basic Blast Radius skill. The aced version acts as an improved alternative to the Mastermind's Spotter skill, by providing a 15% damage boost against enemies marked by the mine's sensor mode.
Strategy[]
Entirely passive in nature, the perks are best used by tactical mine placement. By placing mines in areas with high enemy traffic, significant damage can be dealt overall; both levels allow for effective countering, providing large area damage with the basic, and a significant boost against special enemies.
Trivia[]
Tactical Mines replaced Improved Crafting in Update #39.
While the skill's name remained, Jack Of All Trades' basic effect became the effect of Combat Engineering and its Aced effects got changed considerably, massively changing the effect of the skill in the game.
Jack Of All Trades
Technician
Tier 4
Basic (4 pt): The radius of trip mine explosions are increased by 70%.
Ace (8 pt): You can now carry sentry guns and trip mines at the same time. When you deplete your trip mines or sentry guns you will switch to the other one.
Mechanics[]
Players with the basic skill receive a 70% increase in mine explosion radius, a reduced form of the Blast Radius aced skill (which Jack Of All Trades replaced). Acing the skill allows players to swap between trip mines and sentry guns during levels: by equipping either resource and depleting it, the player will automatically swap to the alternate items.
Strategy[]
This skill significantly increases the versatility of the Technician class, no longer restricting them to choosing between providing covering fire, or laying traps and setting charges. Players using the skill should choose carefully on each day, and deploy items tactfully to maximize the effectiveness of both.
Since items cannot be swapped at will, players with multiple charges or sentry guns should plan ahead: if, for example, a player urgently needs sentry cover but has leftover C4, all charges must be wasted before the swap can be made. Neither can shaped charges be placed while the sentry gun is still equipped.
Trivia[]
A Jack of All Trades is an individual who is competent in many different skills but not necessarily a master of any, which seems a bit inappropriate when used in this context as players with this skill are not mildly competent in all trades at once, but rather are particularly specialized in Sentry Gun and Trip Mine operations only.
It could, however, mean that the player is now skilled in all trades of the Technician deal.
Having this skill also means that one can no longer carry either Trip mines or Sentry Guns, both deployables will be selected upon equipping one and that one will have to be exhausted first before the other can be used (not that it's a detriment anyhow).
Jack Of All Trades was added in Update #39. It took on the location of Blast Radius along with some of its characteristics.
Having Jack of All Trades is currently the only way for a player to carry more than 1 type of deployable.
The full effects of Silent Breaching were moved to the basic version of Hardware Expert.
Silent Breaching
Technician
Tier 4
Basic (4 pt): Your drill and saw makes 65% less noise. Civilians and guards are less likely to hear your drill or saw and sound the alarm.
Ace (8 pt): Your drill and saw is silent. Civilians and guards have to see the drill or saw in order to sound the alarm.
Mechanics[]
Non-upgraded drills, by default, have a sound radius of 25 meters. Guards or gangsters within this range will path towards the drill to investigate. If an object blocks the enemy's line of sight of the drill, this range is halved to a default distance of 12.5 meters[1]. The basic version of this skill reduces the default sound radius to 9 meters, and 4.5 when the line of sight is obstructed.
Acing the skill reduces this radius to zero, meaning guards and civilians must spot the drill themselves to become alerted.
It is worth noting that this skill also affects the thermal lance used in some missions.
Note: The sawing references to the saws in the Aftershock heist. It doesn't alter the OVE9000 saw in any way.
Strategy[]
In loud heists, this skill is entirely useless, as sound radius is meaningless if the players have already been detected. On stealthy heists, this skill sees significantly more use (Firestarter Days 2 and 3, Nightclub, Big Oil, Bank Heist, Election Day, Shadow Raid, and Big Bank all benefit from this skill). However, there are some circumstances on quiet heists when loud drills are preferred over silent ones. One of the most common examples of this is the power box room on Firestarter Day 3. A loud drill can be started on this room on the roof of the bank to lure guards to a secluded area where they can be easily killed. If in doubt, it is best to consult with your team before silencing a potentially beneficial drill.
As the more practical drilling spots (security doors, safes, etc...) usually have more silent, faster and/or more efficient (but still quieter than drills nonetheless) methods of breaching like Lockpicking Expert, ECM Overdrive, or simply by means of a keycard, acquiring this skill is only recommended if one were to rely mostly on drills to open up locked doors/safes during stealth, or are trying to unlock a higher tier in the Technician tree. However it's very useful if a titan safe must be opened silently since they can only be drilled.
Trivia[]
A silent drill/saw jamming still provides auditorial noise to the players, but not to NPCs. This is done due to gameplay reasons.
Sentry Combat Upgrade's aced effects were moved to the aced version of Third Law, while the mechanic of the sentry gun's user using their own ammo for their sentry became part of the sentry gun's deploying process.
Sentry Combat Upgrade
Technician
Tier 5
Basic (4 pt): You can reload the Sentry Gun with your own ammo.
Ace (8 pt): Your sentry gun receives a protective shield.
Mechanics[]
This skill increases the longevity of the turret. The basic version of the skill allows the owner of the turret to refill it at the expense of their own ammunition, while the aced version puts a bulletproof shield infront the turret's system unit. The shield is similar to the shield special unit in that it is impervious to all harm from the front and it forces enemies to attack it from the sides or in the back. This makes the sentry gun impossible to destroy from the front, requiring law enforcers to flank it and then shoot it.
Strategy[]
The combat upgrade is where the sentry gun will really start to be an effective line-holder and is recommended that this skill be aced for people wanting to use the sentry gun.
The now-updated basic effect allows the owner of the Sentry unit to reload it at the expense of their own ammo, and while this tactic might sound ill-advised in a heated firefight where ammo is a constant issue, it still provides a better alternative to carrying an additional turret (which costs a great deal of skill points to acquire). Furthermore, since carried ammo is replenishable, players with this skill can technically sustain their Sentry Guns indefinitely. Combined with the targeting package upgrade, this will make the sentry more ammo efficient, further prolonging the sentry gun's combat effectiveness.
However, it is important to note that replenishing the ammo of the sentry gun often takes up most, if not all of the players' ammo. Therefore, it is important to only do so when there is plenty of ammo to spare (e.g. Ammo Bags or ammo drops)
The shield makes the sentry gun effectively invincible if placed in the correct areas. Enemies cannot harm the gun from the front, forcing them to shoot it from the back or in the sides. By placing them in areas where they must expose themselves to the crew's line of fire, the sentry gun will do its job without fail until it runs out of ammo.
Currently, it is possible to refill another heister's sentry gun so long as you own this skill, causing its kills to be recorded under its "new owner".
Trivia[]
For gameplay reasons, players with this skill can reload their Sentry Guns with all kinds of ammunition, even those that would seem too large to fit the chamber of the unit (e.g. the Thanatos .50 cal's .50 BMG, shotgun shells/slugs/HE Rounds, etc...).
Shaped Charge's basic effects became part of the More Firepower skill, while the ability to place shaped charges became a default gameplay feature.
Shaped Charge
Technician
Tier 5
Basic (4 pt): Adds 3 more trip mines to your inventory.
Ace (8 pt): Trip mines can now be converted to shaped charges, used to breach certain safes and doors.
Mechanics[]
After purchasing the Ace rank of this skill, previously uninteractable C4 icons on objects will become usable (with the standard Interact key) so long as you are carrying trip mines. Placing a shaped charge consumes one trip mine, and all C4 spots on an object must be 'filled' in order to open the object in question. In most cases, this may be only one (as in doors and small '1x1' safes), but it can be up to four for the largest safes.
This skill is not required to place the C4 in any missions where the placement of C4 is a required objective, such as Hotline Miami.
The Demolition Man and Hardware Expert skills do not reduce the time required to deploy shaped charges, only trip mines.
Strategy[]
Shaped Charges are handy in many situations. They are mostly used to open safes, doors, armored cars (note that exploding the doors will also destroy the closest 2 safes inside), basically just about anything that can accept a Shaped Charge. Using Charges rather than the OVE9000 also gives a team the advantage of each carrying two weapons while being able to quickly pass through obstacles. The quick application along with a relatively short fuse time means that the whole crew can bust up loot containers (e.g the trucks in Day 1 of Firestarter) and flee with the secured items in short order, sometimes even before the police can arrive.
Do note that, Shaped Charge detonations are very loud and can potentially be a major hamper when going for stealth if civilians and guards are not controlled first. The high tier requirement and cost of the skill may also be an issue, as this will likely be a late-game addition and only by acing the skill can a player place a charge, thus potentially leaving their character awkwardly lopsided skill-wise due to the high reservation of upgrade points.
Sentry Tower Defense's basic effects were modified and turned into the Tower Defense skill, while the aced version's mechanic of increasing the sentry guns' damage was reimagined in the aced version of Engineering.
Sentry Tower Defense
Technician
Tier 6
Basic (4 pt): You can now place 2 sentry guns instead of just one.
Ace (8 pt): Your sentry gun damage is increased by 300%.
Mechanics[]
Sentry Tower Defense greatly increases Sentry efficiency by doubling the deployable amount, and improving damage output. Whilst conservative usage is common, placing both sentries effectively increases damage output by six times when aced.
Strategy[]
Because unlocking and upgrading the sentry gun represents such a large point investment, it is recommended that players take an "all or nothing" approach to the sentry gun upgrades. If only a few points are invested into the sentry gun, the gun will be largely ineffective and those points may be wasted. However, to raise the sentry gun to an acceptable level, a massive number of the player's skill points must be dedicated to their use. If a player is willing to make this commitment, it may be worthwhile to get all or many of the skills in the sentry gun family.
Players seeking to use the sentry gun effectively in combat will definitely wish to consider this skill, as it increases the power of the sentry guns by a fearsome amount.
Trivia[]
The name of this skill may be a reference to the Tower defense genre of video games.
The effects of Mag Plus were revised and moved to Close By Ace, Surefire Basic, and Gun Nut Basic.
Mag Plus
Technician
Tier 6
Basic (4 pt): Your weapon magazine capacity is increased by 5 rounds.
Ace (8 pt): Further increases your weapon magazine capacity by 10 rounds.
Strategy[]
This skill is highly useful if the player has a powerful, small magazine weapon (say, an M308) but finds its effectiveness somewhat limited by the need to reload frequently. Fundamentally this skill acts as a semi-permanent Extended Mag to most weapons, as it grants one a total of 15 extra rounds per mag, but the total ammo count remains unchanged. If you find yourself reloading too often mid-firefight you may find Mag Plus a great solution.
On the other hand, players using high-fire rate weapons on auto fire may find themselves wasting more ammo and a larger magazine capacity will make the player more vulnerable to emptying their ammo reserves while being electrocuted by a Taser.
In short, Mag Plus fills a very niche role that can, and in some cases should, be replaced by a given weapon's Extended Mag modification, and is purely a matter of preference. It can be of arguable usefulness to a firearm without a magazine modification, or an augmentation to one that does but the amount gained from modding is still inadequate, though its position on the Technician skill tree mean it may never see effective use.
Bulletproof's basic effects were debuffed and moved to the basic version of Iron Man, while its aced effects were moved to the basic version of Shock And Awe.
Bulletproof
Technician
Tier 6
Basic (4 pt): Improves your armor so you can absorb 50% more damage.
Ace (8 pt): The armor recovery rate of you and your crew is increased by 25%.
Mechanics[]
With the basic version of this skill, the amount of armor offered by the player's equipped armor is multiplied by 1.5. Combined with the Armorer Perk Deck, this skill provide a combined multiplier of 1.85, and enables the maximum armor amount (with the Improved Combined Tactical Vest equipped) to increase to 314.5. This value is higher than even a player's base health, which is 230. [1]
The reduction to armor recharge time stacks with other reductions to armor recharge time multiplicatively, with this skill and Die Hard aced. The two stack to give a recharge time reduction of 63.75% the default value, which translates into 1.09 seconds removed out of the standard 3, decreasing the final recharge time to 1.91 seconds. With the Hitman Deck, which adds 45% armor recovery, it can reach a recharge time of 1.05 seconds.
Despite the armor recovery animation taking a few moments to appear to complete ingame, armor is instantly regenerated to full as soon as the animation begins [1]
Armor Stats[]
Armor
Basic
Bulletproof
Bulletproof + Armorer Deck
ICTV
170
255
314.5
CTV
90
135
166.5
Flak
70
105
129.5
Heavy Ballistic
50
75
92.5
Ballistic
40
60
74
Lightweight
30
45
55.5
Suit
20
30
37
Strategy[]
On intense loud heists, this skill can be a life saver in the most literal sense. Even with a light armor equipped, the player's survivability increases greatly. With heavy armors such as the Improved Combined Tactical Vest, the player becomes nearly immune to damage. Even Snipers are unable to damage a player with this setup on Deathwish difficulty, as their attacks deal 240 damage and, with this skill, the ICTV has a capacity of 314.5. [1]
Trivia[]
Despite the name of the skill suggesting total immunity to gunfire, Bulletproof only provides additional protection from it.
The full effects of Dead Presidents were moved to the aced version of Chameleon.
Dead Presidents
Ghost
Tier 1
Basic (1 pt): Adds 10% value to loose cash that you pick up.
Ace (3 pt): Further adds 20% value to loose cash that you pick up.
Mechanics[]
Dead Presidents confers a cash bonus only to loose cash pickups, such as jewelry, gold bars, and bundles of cash. Loot bags receive no bonus from Dead Presidents.
Strategy[]
Players with Dead Presidents should coordinate with their teams to gain the highest possible benefits from the skill. On maps that have a high amount of loose cash items, such as Bank Heist and its variants, Four Stores, Jewelry Store, Diamond Store, and Big Bank, a player with Dead Presidents can be highly profitable for the team. Before starting the heist, this player should announce that they possess this skill and ask that no other players pick up loose cash items. While other players complete objectives or open deposit boxes, the player with this skill should go around with the explicit task of collecting loose cash items as they are found.
Notes[]
The heists Four Stores and Bank Heist: Deposit use objectives based on fixed amounts of instant cash acquired, so completion of either can be slightly accelerated by this skill. On Four Stores this is usually irrelevant, as access to this skill requires unlocking the ECM which can be used to open an ATM without sawing them open. A stealth run of Bank Heist: Deposit may be accelerated by a few minutes depending on luck, however this effect will be become less and less noticeable on higher difficulties as loose loot values are much higher.
Players with some spare points in a build but with little spent in the Ghost tree may find Dead Presidents a profitable place to spend them as the $17k total to buy the aced version of the skill often pays itself off within one heist.
Even when considering the extra respeccing costs of a typical build including aced Fast Hands, aced Cleaner and aced Sprinter, the addition of Dead Presidents can pay for itself and be respecced out after a small number of Death Wish heists on loose loot intensive levels such as Bank Heist: Deposit, Big Oil Day 1 and Diamond Store.
By contrast, players investing heavily in the Ghost tree may wish to avoid Dead Presidents as the cost of respeccing it out of a build can be much much higher, requiring more runs to pay itself back.
Trivia[]
The name "Dead Presidents" refers to the fact that United States currency typically features images of deceased former presidents. The major exceptions to this rule are the ten and one hundred dollar bills, which feature Alexander Hamilton and Benjamin Franklin respectively, who were never Presidents of the United States.
It could also be a reference to the film Dead Presidents which involves stealing money or the film Point Break which features a gang of bank robbers called the Ex-Presidents.
Sprinter's basic effects and its aced version's speed-boosting effect were moved to the basic version of Duck And Cover, while its dodge-increasing effect was debuffed and moved to the new skill's aced version.
Sprinter
Ghost
Tier 1
Basic (1 pt): The time before stamina regeneration starts is reduced by 25% and the regeneration of stamina is increased by 25%.
Ace (3 pt): Your sprint speed is increased by 25% and you have a 25% better chance of dodging enemy fire while sprinting.
Mechanics[]
The basic version of Sprinter cuts down the player's stamina regeneration time by 25% and equally increases the regeneration rate, effectively replenishing more energy over less time.
Acing the skill also increases the player's sprint speed by 25% and reduces their chances of getting shot while doing so (again, by 25%).
Strategy[]
Even for players who do not plan to specialize in the Ghost tree, this skill can be very useful, as its aced version increases movement speed and grants a very large chance to dodge attacks, taking no damage at all. This skill is ideal for situations in which a player must cross an open area that is being guarded by a large number of law enforcers or move a large number of bags. On loud heists, it will provide a chance that the player takes no damage from attacks, which can be potentially life saving. On the other hand, on stealth heists, this skill can increase a player's movement speed, allowing quick entry and escape from a potentially risky situation, such as being surprised or cornered by guards.
It is recommended that one wears only the Two Piece Suit if they want to maximize this skill's effectiveness, as their base movement speed, stamina consumption rate and bullet dodging chances are at their highest values while only the suit is equipped. Those wearing heavier armors, however, will see no benefit from the increased dodge chance, since the base dodge ratings of those armors are large negatives numbers, e.g. -40 for the Combined Tactical Vest or -50 for the ICTV. The aced level of this skill does pair very well with the Crook or Rogue perk deck's bonuses to dodge.
Cat Burglar's fall damage-reducing effects were made a default gameplay feature, while its custody time-reducing effect was removed from the game.
Cat Burglar
Ghost
Tier 1
Basic (1 pt): You take 75% less damage from falling.
Ace (3 pt): Your fall damage is reduced so that you only take armor damage from falling from non-fatal heights. Your custody time is reduced by 50%.
Mechanics[]
Without this skill, fall damage deals 40 health damage to the player (as well as depleting their armor charge).[1] For the basic version of the skill, the player's fall damage from non-fatal heights is heavily reduced that they take only 10 health damage, which is a very small portion of the player's default 230 health. For the aced version, the 75% damage reduction still applies and armor is first damaged, then health. The player's custody time is already halved.
Strategy[]
Even at its basic iteration, Cat Burglar is very useful for almost any player build. This can allow players to jump from heights where it is normally ill-advised to do so because of the large damage penalty, a particularly useful asset to have if one needs to escape from an area quickly. For stealthy players, this can allow them to drop from most heights without much regard for their health, increasing their access throughout the map.
Players with Berserker may wish to forgo this skill, as fall damage is a very easy way to deal controllable amounts of health damage to oneself, thereby increasing damage dealt.
The custody time reduction is entirely useless on Very Hard or harder difficulties, where players are required to release a hostage to free a teammate, instead of waiting out a timer.
It should be noted that the ace effect only works if the player has 75% armor capacity upwards, otherwise any damage remaning will be imposed on their health.
Trivia[]
A cat burglar is a robber who is very stealthy and is usually remains undetected.
It is also common to associate a cat burglar with a burglar who enters through a upper window, skylight etc. Which suits the effects of the skill (negating most of the damage from falling from high places)
The full effects of Fast Hands became a default gameplay feature.
Fast Hands
Ghost
Tier 2
Basic (1 pt): You can pack and interact with loot bags 25% faster.
Ace (3 pt): Further increases your pack and interaction speed with loot bags by 50%.
Mechanics[]
This skill increases one's interaction speed with bagging lootable items and picking up bags of all kinds.
Note that this skill does not speed up the body bagging process, but it does make picking up dropped body bags faster.
Strategy[]
Despite being in the Ghost tree, this skill is of notable aid to any player tackling missions involving many loot bags. This is especially true during those that often require shuffling them to and from points, such as Watchdogs, Firestarter and Framing Frame. Whether going stealth or going loud, being able to grab multiple bags in quick succession for the four point cost is a worthwhile consideration.
Fast Hands pairs well with Transporter to quickly haul loot bags across a heist.
The full effects of Shinobi became default gameplay features.
Shinobi
Ghost
Tier 3
Basic (1 pt): Your walk speed is increased by 25% and your crouch speed is increased by 10%.
Ace (3 pt): Enemies make 95% less noise when shot or meleed to death.
Mechanics[]
When civilians or guards are heavily injured or killed, they will always scream. This scream is audible to other guards or civilians within a 6 meter radius, even through walls or floors. As a result, it is very risky to kill guards or civilians in close proximity to other humans. Acing this skill will reduce the sound radius of the scream to a mere 0.25 meters. Chances are, if an enemy is within this sound radius, they are also likely close enough to see the body, so the remaining noise has no negative impact on gameplay.
Strategy[]
For all players this skill is highly recommended in order to be able to stealth heists. Most maps are relatively small in scale, and killing an enemy too close to others will quickly cause a chain reaction that alerts the entire map. The basic skill grants invaluable speed bonuses that will aid any build. The aced version is also highly recommended for any stealth build. In loud heists, the basic version allows bags to be moved faster due to the walk speed increase.
The aced version of the skill is identical to the effect of Hidden Blade aced version, offering a 95% decrease in sound for NPCs killed, and could be equally important for stealth -- either skill makes it much easier to kill guards even when in close proximity to other NPCs. The effects do not stack to give a 99.75% reduction in enemies' noise, nor would there be any practical impact on gameplay if they did, making acing both skills redundant, and as such Shinobi should not be aced if Hidden Blade has already been aced, and vice-versa.
Trivia[]
The Japanese word "shinobi" is synonymous with ninja.
SMG Specialist's basic effects were debuffed and moved to the basic version of Aggressive Reload, while its aced effects were removed from the game.
SMG Specialist
Ghost
Tier 3
Basic (1 pt): Increases your reload speed of SMG weapons by 35%.
Ace (3 pt): Increases your rate of fire with SMGs by 20%.
Mechanics[]
The description of this skill is fairly accurate. Reload time is multiplied by 0.65 and rate of fire by 1.2.
Strategy[]
This skill is similar to the Gunslinger and Shotgun Impact skills of the Mastermind and Enforcer trees, respectively, as well as the Silent Killer skill from the Ghost tree. While the other skills improve pistols, shotguns, and silenced weapon damage greatly, this skill does not increase the damage per shot of SMGs at all. Instead, it increases rate of fire and reload time, which allows the player to maintain long periods of sustained fire and increase damage per second. However, the additional damage comes at the cost of rapid ammo expenditure. Also, most SMGs already have a high rate of fire, so the boost is minimal when compared with other skill boosts to weapons. However, compared to other classes of weaponry, maximizing the SMG class' efficiency will prove to be significantly cheaper than other weapon classes (4 total against 12 for shotguns, pistols and rifles), so if a player is perfectly fine with relying on an SMG as a secondary (like the Krinkov), this skill is recommended.
When modifying weapons, players with this skill will likely wish to place additional emphasis on stability to counteract the additional recoil created as a result of the higher rate of fire.
Care must be taken to avoid spending all of a player's ammunition too quickly, so short bursts of fire are advised. From a highly accurate and stable weapon with moderately good damage, this burst will likely kill any standard enemy on Overkill or below. Bulldozers are vulnerable to this skill; a high damage SMG affected by the rate of fire increase of this skill is capable of shredding through a Bulldozer's faceplates rather quickly.
The full effects of the Lockpicking Expert skill were moved to the aced version of the Nimble skill.
Lockpicking Expert
Ghost
Tier 5
Basic (4 pt): Increases your lockpicking interaction speed by 25%.
Ace (8 pt): You can now silently crack safes by hand. Further increases your lockpicking interaction speed by 25%.
Mechanics[]
The 25% bonus from the basic skill and from the aced skill stack additively to grant a total speed bonus of 50%. Players with the skill aced will be able to pick doors and deposit boxes exactly twice as quickly as players without it. Players with the aced version of this skill are able to lockpick safes, as well as other special items, like the counting machines in Big Bank. Lockpicking safes, regardless of size, takes 45 seconds. Titan safes cannot be lockpicked.
Strategy[]
Lockpicking safes is a very useful skill when a safe must be opened stealthily. The money safes on Nightclub, the manager's safe in Big Bank, and the FBI safe on Firestarter Day 2 are ideal candidates to be picked because stealth is paramount on those missions. Technicians with the Silent Drilling skill provide an alternative stealthy method of cracking safes, but without the speed and mobility of a player with this skill.
On loud missions, Lockpicking Expert can also be useful, as the 45 second picking time is still faster than any drill. For large sized safes, the rapid lockpicking speed compared to a drill is even more noticeable. A technician with Shaped Charge aced is likely a better candidate to open safes, as the charges can easily open even large safes in half the time of a ghost with Lockpicking Expert aced. However, should the technician run out of charges or have a desire to save them to use as trip mines, this skill provides an excellent alternative.
Generally speaking, though, this skill mostly confers benefits only to those who prefer to pick locks in stealth and/or with a crew. As picking a lock takes time and camps the player at the immediate area adjacent to the lock, they are left vulnerable should an enemy walk in on the picking. The process can be interrupted but will reset the progress meter if one chooses to do so. Lastly, this skill is useless against Titan safes.
Since there are other faster methods of getting through safes/locked doors (i.e. a Saw, Shaped Charges, shooting the locks...), one should only pick this skill if they would like to handle the heist in stealth, are somewhat proficient at managing their surroundings, are confident that they can pick a safe/door uninterrupted and need to use those skill points for a non-technician tree (eg: Fugitive-Ghost). Using a Silent Drill is indeed slower, but it also frees up a player to watch out for guards and/or handling other objectives while the drill is underway, and is far lower in its respective skill tree.
Trivia[]
This skill is rendered less useful for most heists on Death Wish difficulty, since it replaced pickable safes with TITAN variants. Its aced safe-cracking ability is also oddly useless in the two stealth-only heists of the game; Shadow Raid and Car Shop, although the increased speed on regular interactions may still assist.
Gallery[]
A pick-able safe
The full effects of Moving Target were moved to the aced version of Parkour.
Moving Target
Ghost
Tier 6
Basic (4 pt): You can now sprint while strafing.
Ace (8 pt): You can now sprint in any direction.
Mechanics[]
This skill is rather straightforward; as stated in the description, it allows players to sprint while moving from side to side (basic) and backwards (aced).
Strategy[]
Ghosts with this skill may become more mobile, and it is recommended that ghosts make the most of this mobility with synergising skills like Sprinter, Transporter, or Run and Gun. When paired with the high movement speed and additional dodge chance while moving offered by Sprinter aced (as well as the sprinting additonal dodge), this skill allows ghosts to cross hostile terrain with more maneuverability. When combined with a silenced weapon, The Professional and Iron Man Aced it compliments the "run and gun" playstyle as silenced weapons have high stability and accuracy bonuses, if combined with aced Hard Boiled, it can offer as much accuracy as standing still while shooting. Aced Kilmer assists with assault and sniper rifles, where one may quickly escape and reload.
Despite its benefits, this skill pales in comparison to other top-tier skills. The ability to sprint backwards, for instance, costs 8 points, yet has few practical applications. While it has niche benefits, the 12 skill point investment may be better spent elsewhere.
Trivia[]
Both effects of Moving Target comprises the sprinting mechanic in PAYDAY: The Heist before they were revised into skills to "balance out" gameplay.
The ability to activate ECM feedback became a default gameplay feature and the aced version's feedback duration-increasing effect was moved to the aced versions of ECM Overdrive and ECM Specialist.
ECM Feedback
Ghost
Tier 6
Basic (4 pt): You can now interact with ECM jammers to cause a feedback loop. When interacted, the ECM jammer has a 50%-100% chance to incapacitate enemies within 25 meters radius every 1.5 seconds. ECM feedback lasts 15-20 seconds.
Ace (8 pt): You will now instantly interact with a ECM jammer and the ECM feedback duration is increased by 25%. Your ECM Jammer has 100% chance to recharge itself every 4 minutes
Mechanics[]
ECM Feedback is activated by interacting with an already placed ECM. If the skill is aced, this interaction is instantaneous; however, basic skill users will have a several second interaction time. Acing the skill is not necessary to achieve the full benefits of this skill, but can be done to increase duration and convenience for the player. When activated, nearly all enemies within the range of the ECM are incapacitated. They will often display an animation of clutching their ears and rocking back and forth, allowing the player to score easy headshots, even against specials like the Shield or Bulldozer (with the exception of Captain Winters and the Cloaker, who are immune to ECM Feedback). Affected enemies (with the exception of Bulldozers) will remove their helmets, but this change is purely aesthetic and does not make them easier to kill.
Strategy[]
ECM Feedback is somewhat contrary to the general ideals of the Ghost tree, as it has no practical impact on the mission while it is still quiet. In fact, if guards (even civies) are affected by ECM Feedback while the mission is still being stealthed, they will be instantly alerted and attempt to call the police. Therefore, this skill is purely used for loud engagements or as a Plan B phase on heist such as Framing Frame or Election Day, where a ghost will pack their ECMs.
When used properly on loud heists, ECM Feedback is comparable to the sentry gun of the technician in that it provides swift and effective area denial. The main difference is that ECM Feedback deals no damage to targets; it merely incapacitates them, allowing players to kill them with little fear of retaliation. In heists where enemies can build up and swarm rapidly, this can be extremely useful as a choke-point trap.
Note that feedback can be activated even after the ECM device has already expended its jamming ability and is not necessary to sync feedback with jamming. So, if a heist is loud, or one is planning to go loud, ECM devices should be pre-emptively placed at areas where they're easily accessible and have an good area of effect once feedback is activated.
Whether to take this skill depends on the builds, especially its aced version. ECM in feedback cannot affect SWAT Van Turrets, and its points may be better spent on dodge skills to provide greater defense/attack power.
Take note that Jokered enemies will also be affected by this skill, countering some of that skill's effectiveness.
Trivia[]
In radio engineering, a feedback loop will in most cases generate a very loud screeching noise that's very unpleasant, if not debilitating to listen to and may cause hearing and/or psychological damage in an individual if exposed to for prolonged periods of time. This debilitation effect is somewhat exaggerated in the game, though is still theoretically plausible in reality if the frequency of the looped signal is high enough. The means by which the Jammer hijacks the enemy comm system to generate the loop is unknown.
The feedback loop will also affect every single enemy within the Jammer's effective range, meaning in smaller heists this can potentially cover the entire map with the stunning signal. In reality, the feedback strength is inversely proportional to the distance between the signal's output and input, meaning that enemies standing further away from the Jammer should be affected less, and units outside of the loop's range are not affected at all. The in-game depiction of the skill was most likely meant for gameplay effects, as by simply moving away from the loop's epicenter the law enforcement units could avoid being stunned by it entirely.
This skill was rebalanced in Update #39 to gain the ability to use ECM Feedback once every 4 minutes per ECM.
An early version of this skill also affects civilians, and forces every afflicted NPC to start vomiting instead of holding their heads in pain like the final rendition. The vomiting animation was recycled for the "Poisoned Cake" pre-planning item in Big Bank instead, and also for the effects from poisoned weapons from the Gage Ninja Pack such as the Kunai Knife.
The civilian effect was re-added in Patch #107.
The full effects of the Camera Loop skill were buffed and moved to the basic version of Nimble.
Camera Loop
Ghost
Tier 6
Basic (4 pt): Interacting with a camera at close range will cause the camera to temporarily see a pre-recording for the next 10 seconds so you can sneak past it. Your crew can only loop 1 camera at a time.
Ace (8 pt): Camera loop duration is increased by 10 seconds.
Mechanics[]
Interacting with a camera in close range (which takes 4 seconds) makes it unable to spot anything for 10 seconds (20 seconds with Aced). A looped camera has an outline visible through walls (similar to converted enemies) and makes a noise. When time is out, noise changes and outline blinks for 5 seconds (at this point camera can be looped again), then camera resumes normal operation.
Titan cameras can be looped like regular ones, and guards do not get suspicious if they see a looped camera.
Strategy[]
This skill is especially useful on heists where a camera operator cannot be eliminated, or on heists where total control of the map is not an option. Because looped cameras do not alert guards (unlike cameras that have been destroyed), this skill has no chance of raising suspicion. Many heists have more than 4 guards present on the map, which means all guards cannot be neutralized, and that if a camera is broken, it is only a matter of time before stealth is broken. Therefore, cameras should only be broken as a last resort. To pass a camera that is placed in an objectionable location (e.g., watching the server room door on Firestarter day 2, watching the vault door on Framing Frame day 3, or watching the final chamber in The Diamond), players with this skill can easily disable the camera for enough time to complete an objective. Without this skill, players would be forced to spend a valuable ECM Jammer to complete the task.
A few heists, such as First World Bank, feature at least two security rooms, with two camera operators. If they are guards, killing/dominating them will count towards the pager limit. If the limit has been reached and the operators cannot be eliminated, camera loop can become invaluable.
However, unlike an ECM Jammer (which can be placed while crouched), camera looping requires the player to be close to the camera and thus often have to stand up to loop the camera. Also, this process cannot be sped up in any manner. This can increase the risk of being detected by a guard.
In a handful of heists, a (Titan) camera may spawn right outside a security room, in which it will increase the difficulty to eliminate the camera operator. Destroying them is not a viable solution as a guard, if still alive, may check on the status of a destroyed camera, potentially breaking stealth. Some exceptions include Four Stores in which the two guards will not check the status of the cameras in the coffee shop and convenience store.
On Death Wish difficulty, this skill gains new value with the introduction of Titan cameras. Because those cameras are indestructible, this skill becomes an even more useful method of bypassing them.
Trivia[]
Along with Spotter, Camera Loop was added to the game post-release in Update #25, replacing the Lucky Charm skill.
It is never explained how a heister that is above or under a camera can apply temporary looping effects to it in such a short time period.
Daredevil's base effects were moved to the basic version of Parkour, while its aced effects were moved to the aced version of Duck And Cover.
Daredevil
Fugitive
Tier 1
Basic (1 pt): Increases your climbing speed by 20%.
Ace (3 pt): You gain a 15% dodge chance while zip-lining.
Mechanics[]
The daredevil basic skill confers a 20% movement bonus to players when moving up or down ladders. The aced version offers an additional 15% dodge while using ziplines.
Strategy[]
The daredevil skill is of dubious usefulness except in scenarios where one expects to be regularly using ladders (or ziplines, if aced). Few heists have ladders, and even fewer have ziplines. As a result the effects of the basic skill is limited to, for instance, GO Bank and Shadow Raid, whereas the aced version is limited to heists such as Big Bank and White Xmas.
The name of the skill may be a reference to the fictional superhero Daredevil.
Hidden Blade's basic effects were moved to the basic version of Inner Pockets, while its aced effects became a default gameplay feature.
Hidden Blade
Fugitive
Tier 1
Basic (1 pt): Increases your melee weapon concealment by 2.
Ace (3 pt): Enemies make 95% less noise when shot or meleed to death.
Mechanics[]
The basic version basically increases the player's concealment by 2.
When civilians or guards are heavily injured or killed, they will always emit a death cry. This scream is audible to other guards or civilians within a 6 meter radius, even through walls or floors. As a result, it is very risky to kill guards or civilians in close proximity to other NPCs. Acing this skill will reduce the sound radius of the scream to a mere 0.25 meters. Chances are, if an enemy is within this sound radius, they are also likely close enough to see the body, so the remaining noise has no negative impact on gameplay.
Strategy[]
For the basic version, obtaining the skill basically guarantees a +2 concealment as all melee weapons have concealment values which affect the detection risk. Thus the skill is extremely advantageous in stealthing heists while using less concealable weapons, as well as making it easier to obtain the bonuses from Sneaky Bastard and Low Blow.
The aced version of the skill is identical to the effect of Shinobi's aced version, offering a 95% decrease in sound for NPCs killed, and could be equally important for stealth -- either skill makes it much easier to kill guards even when in close proximity to other NPCs. The effects do not stack to give a 99.75% reduction in enemies' noise, nor would there be any practical impact on gameplay if they did. Therefore, acing both skills is redundant. Hidden Blade should not be aced if Shinobi has already been aced, and vice-versa.
Trivia[]
The name and effect of this skill are references to the highly concealable assassination weapon of the same name in the Assassin's Creed series.
Thick Skin's aced effects were moved to the aced version of Die Hard, while its base effects were removed from the game.
Thick Skin
Fugitive
Tier 1
Basic (1 pt): Your steadiness is increased by 10.
Ace (3 pt): Increases the armor of all ballistic vests by 20.
Mechanics[]
The basic version of Thick Skin works as a lesser variant of Tough Guy, in that it reduces the degree of flinching when shot at (see Tough Guy for more info).
When Aced, Thick Skin provides a 20 point increase to the armor rating of all equippable ballistic vests (Ballistic Vest, Light Weight Ballistic Vest and Heavy Ballistic Vest). Unlike the similar technician skills and armorer perks, thick skin's effect is a straight increase of 20 rather than the addition of a percentage of the armor's base stats.
Strategy[]
Thick Skin's basic effect operates in a similar manner to Tough Guy, giving a straight increase of 10 to the steadiness rating of all armors, rather than doubling it on a per-armor basis. The ace effect applies only to the ballistic vests (everything between the flak jacket and suit). As a result, the aced version of the skill is only useful for players who regularly make use of the ballistic vests, and the basic version's effect is (as with Tough Guy's basic effect) of dubious usefulness as camera shake from enemy fire is negligible to begin with.
The Aced effect of this skill lends itself well to the focus of both the Fugitive skill tree and its respective Perk Deck, Crook. Both focus on increasing the effectiveness of a player using Ballistic Vests to remain fast on their feet without sacrificing too much survivability - the 20 point increase to armour allows the Ballistic Vest in question to soak up one or two more hits than otherwise possible, which, when used in conjunction with dodge chances given by the Fugitive tree and Crook perk deck, combine to make the player surprisingly tanky, provided they are either sprinting or crouching -- with the lightweight ballistic vest, it is possible to maintain a dodge chance of no less than 40% at all times, along with an armor rating in excess of the flak jacket when further combined with the relevant technician skills.
However, for players that prefer to run a Two Piece Suit and Rogue Dodge build, Acing this skill will provide rather useless. It's recommended that the player buy the Basic version and Ace Hidden Blade instead.
Trivia[]
The skill's name and icon are both references to the Thick Skin player upgrade from PAYDAY: The Heist.
Unlike in the PAYDAY: The Heist, thick skin offers a steadiness and armor upgrade, rather than a health upgrade.
Run And Gun's base effects were moved to the basic version of Parkour, while its aced effects were moved to the basic version of Rifleman.
Run And Gun
Fugitive
Tier 2
Basic (1 pt): You gain 10% additional movement speed.
Ace (3 pt): Your movement speed is unhindered while using steel sight.
Mechanics[]
Like the similar Ghost skill Shinobi, Run and Gun increases the player's movement speed, although to a lesser degree. When aced, the skill completely removes the movement penalty applied when aiming down the sights.
Strategy[]
This skill is useful for players attempting to maximize movement speed. However, the speed difference of movement while aiming down the sights may be jarring and may make precisely aiming while on the move much more difficult than without the aced skill.
Trivia[]
The name of the skill is a reference to the playstyle of Shoot 'em up videogames.
Brother's Keeper was removed from the game.
Brother's Keeper
Fugitive
Tier 3
Basic (1 pt): The damage thugs deal to you is reduced by 10%.
Ace (3 pt): The damage thugs deal to you is reduced by an additional 25%.
Mechanics[]
The basic version of this skill confers a 10% damage resistance against all attacks dealt onto the player by mobsters/bikers (not law enforcers). Acing this skill further increases this resistance to 35%.
Strategy[]
Brother's Keeper only provides practical usefulness in heists with a high gangster/biker population, such as Rats, Hotline Miami, Firestarter Day 1 and Big Oil Day 1, as it only provides resistance against their attacks. Acquiring and acing this skill is not advisable because of the rarity of these enemies. Even though they deal high damage, experienced players can easily anticipate thug-type enemies' location and dispatch them. Even in missions with a high thug population, the thugs are quickly replaced by law enforcers in the first assault wave, making this skill of only fleeting usefulness.
It could alternatively be a hand gesture with strong sexual connotations.
Due to the placement of this skill, and the fact the skill provides lowered damage from thugs, the name could quite possibly be a reference to Jules Winnfield's Bible verse from Pulp Fiction. Jules is a hitman, responsible for taking out targets for his boss, who may quite possibly be thugs. The skill directly next to this one in the tree is called "Winston Wolfe", which is also a confirmed Pulp Fiction reference, as it is named after the cleaner of the same name from the movie.
Winston Wolfe's base effect was moved to the basic version of Cleaner, while its aced effects were moved to the aced version of Sixth Sense.
Winston Wolfe
Fugitive
Tier 3
Basic (1 pt): You can now carry 1 additional body bag.
Ace (3 pt): During stealth, you know how to kill without leaving a trace, reducing your cleaning costs by 75%.
Mechanics[]
The effects of this skill stack with the effects of Cleaner, but this skill only increases maximum body bag capacity; it does not grant the player an additional body bag upon starting a heist.
Strategy[]
The basic version of the skill allows a heister to carry a second body bag (or third, with Cleaner aced) however unlike Cleaner does not provide a second body bag free of charge. This does still have some application, notably during heists where returning to the body bag asset can be time consuming and/or put the heister at risk of detection, such as Election Day Day 2 (Plan A) and Shadow Raid.
The aced version of the skill reduces the cleaner costs for killing civilians which, in tandem with greater availability of body bags from the basic version and from the wider Fugitive tree, can encourage killing civilians rather than taking them hostage. This is especially useful on various heists where moving hostages to a safe hiding place can be very risky, such as Shadow Raid and Train.
However, the aced version of the skill may be a waste of skillpoints depending on how far along in the game the player is -- at lower levels, when money is fairly tight and excessive cleaner costs can drain the player's funds rapidly, the aced version of the skill may come in handy if the heisters are short on cable ties. At higher levels, when the player is more financially secure, the occasional cleaner cost will not make much of a dent on their overall funds. In fact, provided the player isn't killing every single civilian in a given heist, cleaner costs will almost always be covered by the heist's ending payout, making the reduction negligible.
The name of the skill is a reference to the cleaner of the same name in Quentin Tarantino's Pulp Fiction.
The Body Bag Case became unlocked by default, and the skill's aced effects were moved to the aced version of Cleaner.
Undertaker
Fugitive
Tier 4
Basic (4 pt): You unlock the ability to place the body bag case deployable.
Ace (8 pt): You can now place 2 body bag cases instead of just one.
Mechanics[]
Each body bag case is identical to the body bag asset and contains 3 charges. The aced version allows the player to place two such bags, for a total of 6 extra bags.
Strategy[]
Since unlocking the Body Bag asset requires Cleaner from the Ghost tree, Undertaker provides access to more than the starting 1 body bag without having to invest in Ghost skills.
Crucially, Undertaker and the Body Bag case deployable allow a player to bag numerous bodies without having to return to the asset drop location, useful on heists where it can be difficult to return to the van to collect more bags.
The aced version of the skill is of relatively limited use however, as the maximum number of pager responses (4) is the same as the total number of body bags useable by a heister with a single body bag case.
The most appropriate heists for using the aced version of the skill are Nightclub and Shadow Raid. For the former, stealth runs of Nightclub, can be made much easier as the rear areas of the club can be controlled and the guards can be killed and bagged - they do not have pagers so there is no limit to the number that can be killed. For the latter, Shadow Raid guards do have pagers, however the wandering civilians, particularly the workers inside the warehouse, can simply be killed and bagged and moved out of line of sight of patrolling guards (especially with the loot zipline asset, which will carry a body bag too). If a player is expecting to kill civilians, it may be useful to invest in the Winston Wolfe skill too, from the previous tier of the Fugitive tree.
In newer stealthable heists with Pre-Planning such as Big Bank, Shadow Raid and Framing Frame, you can save favors for other assets by bringing a Body Bag case.
Trivia[]
In common usage, an Undertaker is (usually) someone in charge of cemetery and the burial (disposal) of dead bodies, which fits the function of the in-game skill quite well.
Removed in Update #173[]
Specialized Killing was removed from the game, and weapons were buffed to compensate for its omission.
Specialized Killing
Ghost: Silent Killer
Tier 3
Basic (3 pt): You deal 15% more damage with all silenced weapons.
Ace (6 pt): You deal an additional 15% more damage with all silenced weapons.
Mechanics[]
Equipping most suppressors will lower a weapon's damage. Basic Specialized Killing mitigates this by adding 15% of the weapons' base damage to the current rating, thus enabling it to deal more damage per shot. The ace effect doubles the bonus, granting a total of 30% base damage addition, which in most cases will grant a considerably higher damage rating than the unsilenced variant can reach.
Strategy[]
This skill is useful when paired with a properly suppressed pistol/sniper rifle, as both weapon types can generally attain a higher-than-default damage value with it applied. It is also recommended for low-DR stealth/dodge builds if the player relies heavily on suppressed weaponry and/or need to deal a quick burst of high damage when detected.
Due to its ever-suppressed nature, the Valkyria would benefit a lot from the effects of this skill, regardless of situation.
Trivia[]
Ironically, despite what the title suggests, the effects of this skill are applied to all forms of enemies the player can encounter, not just any specific type of target or just special units alone, therefore making it beneficial for very "unspecialized" killing. It does, however, benefit only the use of suppressed weapons, so arguably it does indeed encourage a somewhat specific rule of engagement.
The armor-piercing effect of the pre-Update #100 aced skill became part of the aced Surefire skill.


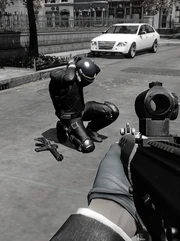
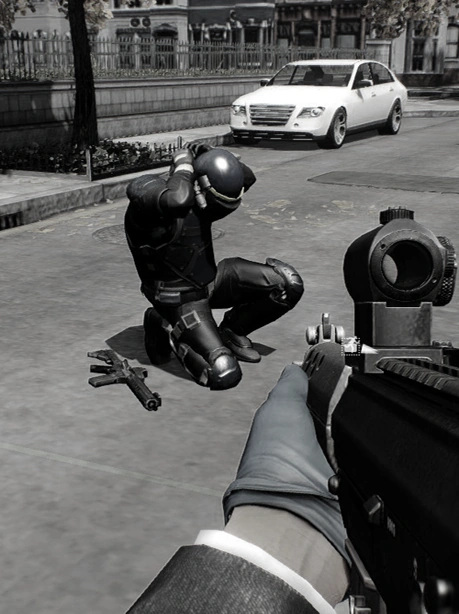


")


")
")
")
")
")
")
")
")
")
")
")
")
")
")
")
")
")
")
")
")
")
")
")