(→Trivia) |
m (→Bugs: single typo) Tag: Visual edit |
||
| Line 116: | Line 116: | ||
*On occasion, the elevator will not move after securing both blood samples, rendering the heist stuck. |
*On occasion, the elevator will not move after securing both blood samples, rendering the heist stuck. |
||
*If the mission goes loud before all the cameras are destroyed, Bain may never give any objectives past controlling the hostages, softlocking the heist. |
*If the mission goes loud before all the cameras are destroyed, Bain may never give any objectives past controlling the hostages, softlocking the heist. |
||
| − | **If the final camera is destroyed just as Bain's countdown to alarm |
+ | **If the final camera is destroyed just as Bain's countdown to alarm expires, the police may not arrive and the heist will softlock. |
*If players decide to mask up and cut a cable before the doctor can describe the patients' symptoms, the heist objectives will never update beyond finding the right patient even if he is found. |
*If players decide to mask up and cut a cable before the doctor can describe the patients' symptoms, the heist objectives will never update beyond finding the right patient even if he is found. |
||
*A blood testing machine may get stuck for very longer periods of time or become static after verifying a blood sample, rendering it unusable for the remainder of the heist. |
*A blood testing machine may get stuck for very longer periods of time or become static after verifying a blood sample, rendering it unusable for the remainder of the heist. |
||
Revision as of 03:42, 9 August 2020
 |
This article is about the remastered heist in PAYDAY 2. For the original version in PAYDAY: The Heist, see No Mercy. | |||
|---|---|---|---|---|
| No Mercy | |||||||||||||||
|---|---|---|---|---|---|---|---|---|---|---|---|---|---|---|---|
| Heist Info | |||||||||||||||
| Contractor | Classics | ||||||||||||||
| Contract Days | 1 | ||||||||||||||
| Loud / Stealth | ✔ / ✘ | ||||||||||||||
| Stealth bonus | 10% | ||||||||||||||
| Loot | N/A | ||||||||||||||
| Base experience (XP) | Both: +3,000 (found correct sample) +8,000 (elevator arrived) +2,000 (elevator taken) Section 1: Stealth: +2,000 (disabled cameras) +7,000 (find file objective started) +2,000 (found file) +1,000 (placed fake sentries) Loud +7,000 (drilled ICU door) Section 2: Stealth: +3,000 (cut wire (ends stealth, gives stealth bonus)) Loud: +7,000 (per patient room drilled) | ||||||||||||||
| |||||||||||||||
| Other | |||||||||||||||
| Internal name | nmh
| ||||||||||||||
| Achievement(s) | |||||||||||||||
| Trophies | |||||||||||||||
| v·d·e | |||||||||||||||
No Mercy is the last heist to be remastered from PAYDAY: The Heist introduced to PAYDAY 2, released on October 30th, 2018, the sixth day of the Breaking News event.
After the PAYDAY crew rescues Bain in Hell's Island, it is discovered Murkywater and the Kataru have experimented on him with the same virus that the crew stole from Mercy Hospital a few years ago, and he only has a couple more days to live. This heist is a flashback of that event.
Overview
- "Bain only has a couple more days. Those Kataru motherfuckers saw fit to shoot him full of virus. Same fucking stuff we stole from Mercy Hospital a few years ago. Whoever we got it for, they sold it to Murkywater and now it's killing him. Knew from the start that was a bad job, Bain did too, but he wanted that Cagliostro manuscript. That fucking book. Should have told him to fuck off, but he said we really needed it for something, and to be honest, we'd never be where we are without it."
- —Chains
The crew must find a patient who has the Green Flu and extract two samples of his blood. There is a random chance Bain will be interrupted by Bill from Left 4 Dead, entering the elevator as a brief cameo.
Overall, the heist is the same as it was in the original, in that it allows for a pseudo-stealth playthrough. While it is entirely possible for the crew to go in loud, the first half of the heist can be carried out without the alarm being raised if they are careful, though the police will inevitably arrive once the second part begins.
Objectives
Assets
Purchasable
| |
| Grenade Case | |
|---|---|
| Price: | $3,000 (Normal) $4,500 (Hard) $6,000 (Very Hard) $9,000 (Overkill) $15,000 (Mayhem) $21,000 (Death Wish) $27,000 (Death Sentence) |
| Requires Gage Weapon Pack #01 DLC | |
| |
| Ammo Bag | |
|---|---|
| Price: | $4,000 (Normal) $6,000 (Hard) $8,000 (Very Hard) $12,000 (Overkill) $20,000 (Mayhem) $28,000 (Death Wish) $36,000 (Death Sentence) |
| |
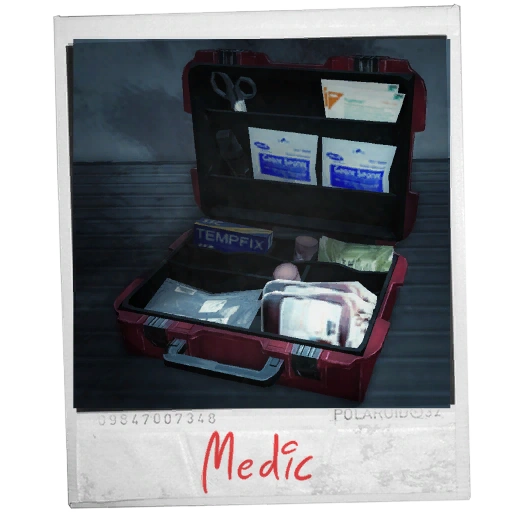
| Doctor Bag | |
|---|---|
| Price: | $6,000 (Normal) $9,000 (Hard) $12,000 (Very Hard) $18,000 (Overkill) $30,000 (Mayhem) $42,000 (Death Wish) $54,000 (Death Sentence) |
Intel
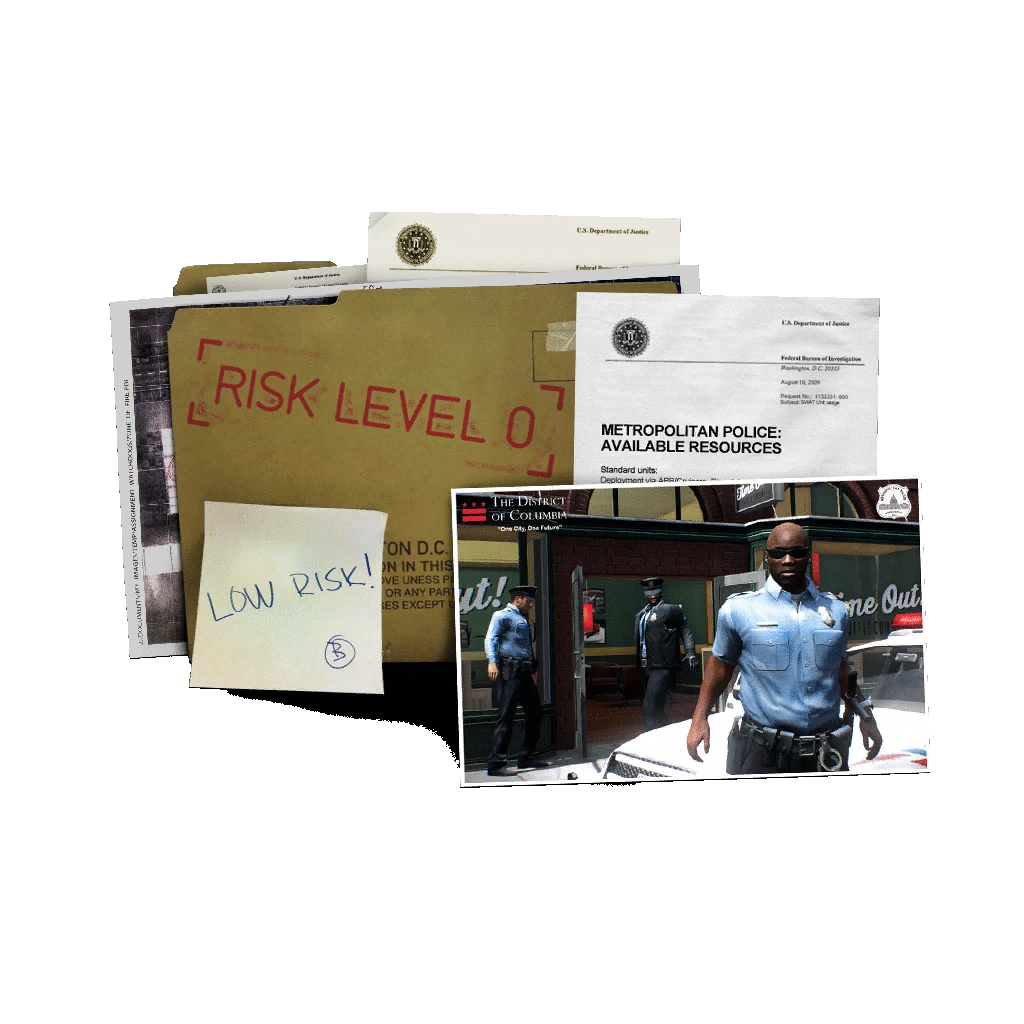
| |
| Risk Level | |
|---|---|
| |
| Gage Courier Packages | |
|---|---|
Walkthrough
Of note, not much has changed from the original. Players must disable the security cameras or, if the heist goes loud, they must obtain the teddy-moo doll to saw through the ICU doors.
If players wish to keep the heist in stealth longer, they must take note of each of the security cameras' positions in which they will be random. After taking note and upon masking up, only 7 seconds are given to disable them all. Silenced weaponry or/and melee strikes are the only way to destroy the cameras without breaking stealth.
Disclaimer: This stealth cannot be fully stealthed, despite the stealth icon in the heist contract. Dress to impress.
Plan A is the stealthy approach to the heist. If carried out correctly, the alarm will not be raised and the police will not arrive until the second phase of the mission.
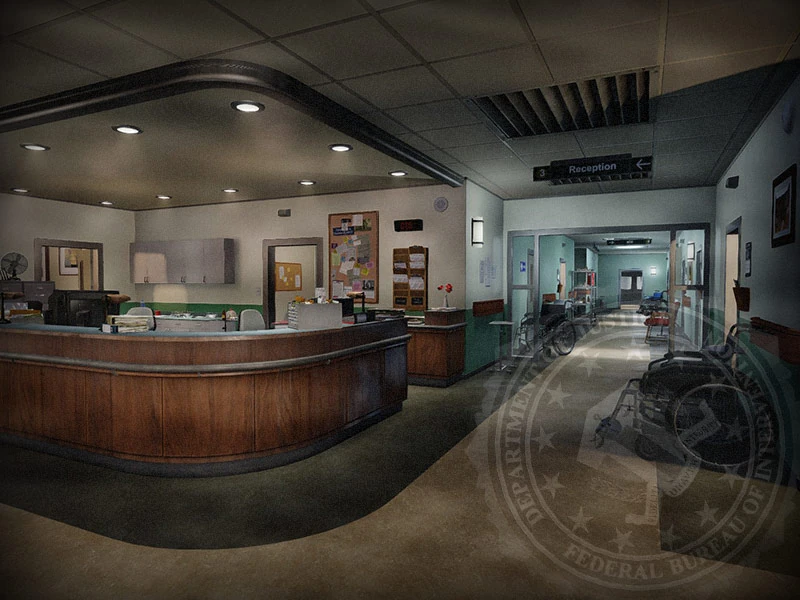
After exiting the elevator, the crew will find themselves in the lobby of Mercy Hospital. Civilians and doctors distributed randomly throughout the area, with the majority being located near the reception desk. Several security cameras will also be placed in random locations. Bain will alert the crew that once they begin the heist, they will have seven seconds to destroy every camera. He will also state how many cameras there are, this will vary depending on how many players are connected. There will be three cameras if the player is alone, six if there are two players present, and nine if there are three or four players. Bots do not count towards this.
Once the heist begins, the crew will have seven seconds to destroy every camera. Silenced weaponry and/or melee strikes are the only way to do so without breaking stealth. If the cameras are not disabled within this time, the alarm will be triggered. Afterward, the crew must keep the civilians down. Some of them will run for the three-alarm buttons; if any of them are hit, the alarm will be raised. These buttons are located near the elevator, in the hallway near the staircase, and behind the front desk. If any of the hostages are killed the alarm will go off, due to the stress causing heart attacks in patients with pacemakers.
If the crew manages to stop the alarm from being triggered, they can continue with Plan A. This involves checking the patient database to locate the infected individual, answering the phone and letting Bain deal with the callers, and locating a file on the target patient. There is a chance a guard will spawn from the bottom of the staircase, if he is not dispatched before he reaches the top, the alarm will go off, but he won't have a pager to be answered. There is also a chance of construction workers spawning in the same location, or civilians spawning from the elevator. They will all make a dash for the alarm, if not stopped by the crew first.
After locating the file on the target patient, the crew must set up four "fake sentries." These will stop the civilians from getting up, therefore stopping the chance that one may hit an alarm button. The crew then suits up in scrubs to infiltrate the ICU (Intensive Care Unit).
This begins the second phase of the mission. The crew will enter the ICU and be greeted by Doctor Schneider. She will give them a tour of the three Isolation Ward Units, and go into detail regarding the various patients' symptoms. After visiting the three units, she will return to her starting position. The crew may ask her to take another lap, where she will go into further detail about their blood pressure and how long they will have to stay in Intensive Care. After this, she will no longer give information about the patients. Based on the information she provides, the crew must decide which chamber locates the target. An alarm box located in an unfinished room will have three colored wires, each leading to a chamber.
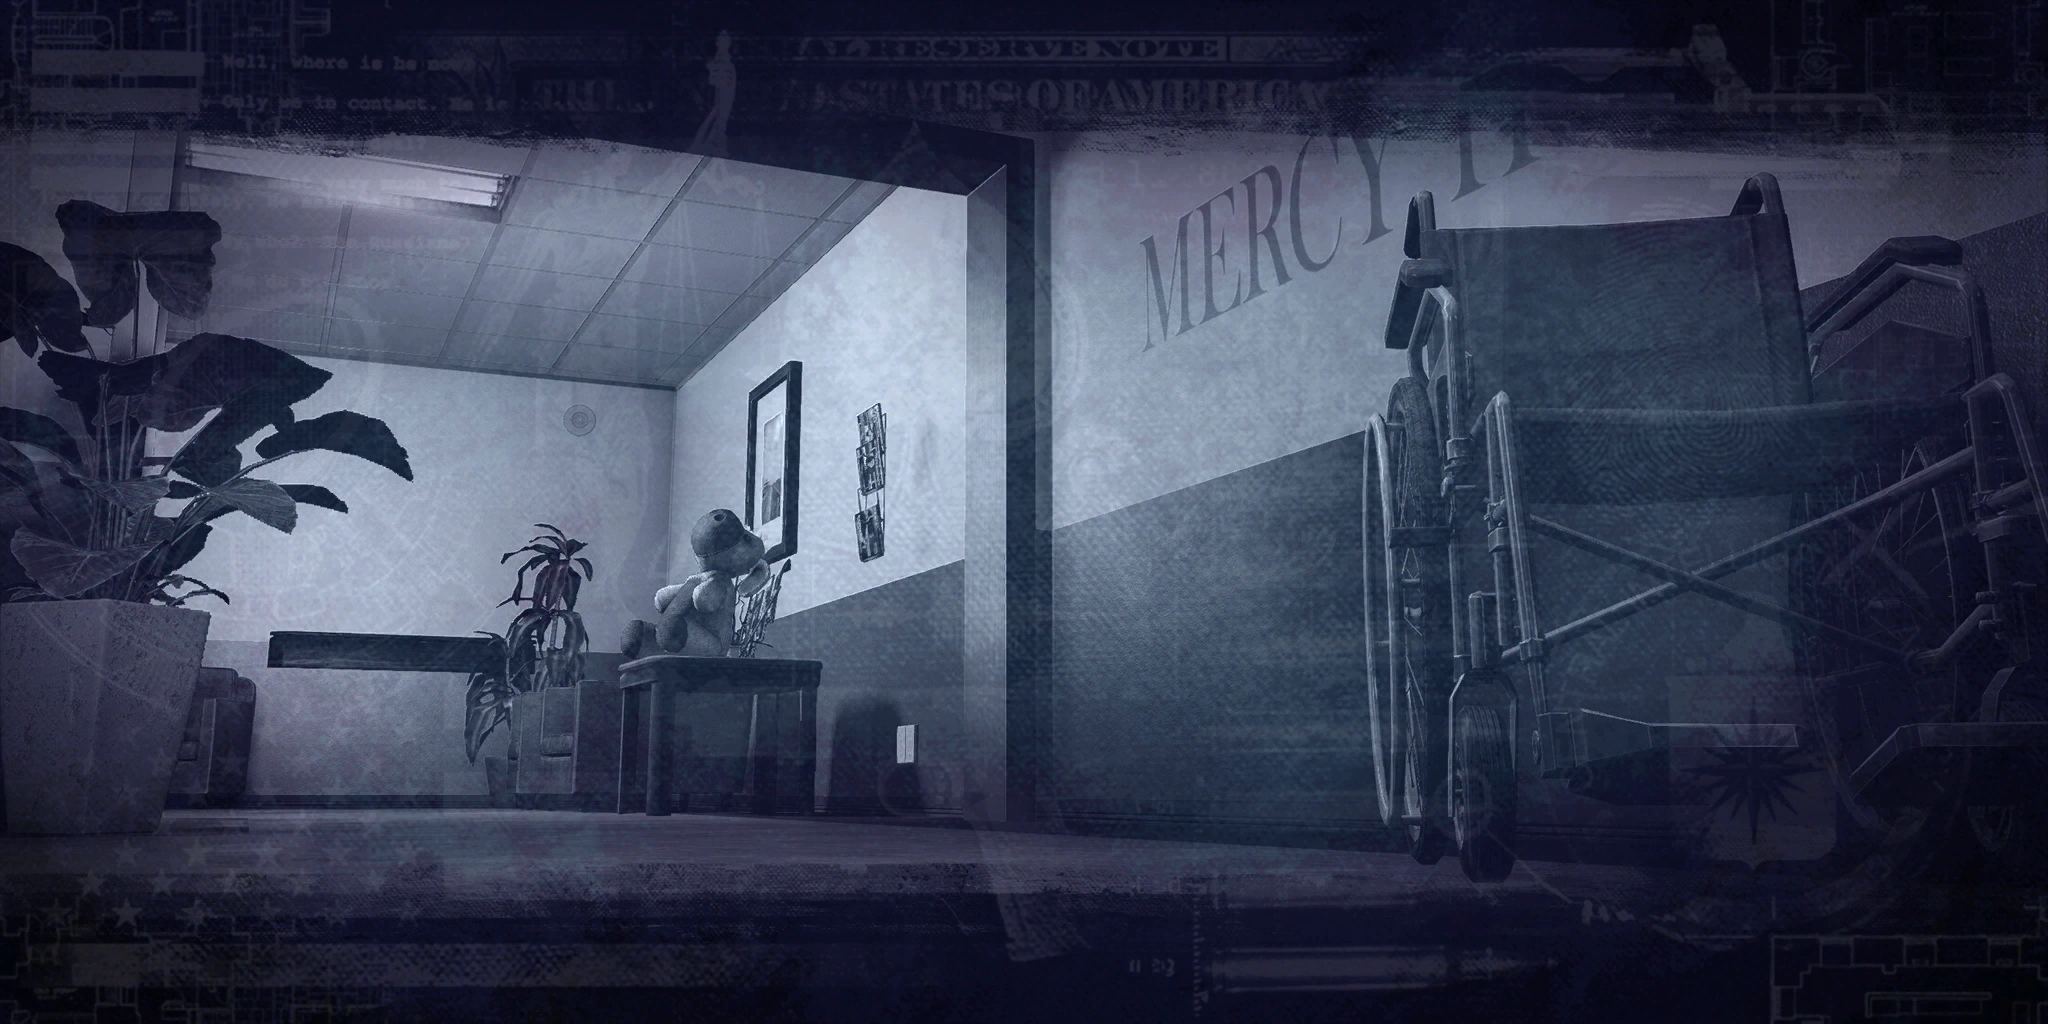
Once the heist begins, the crew will have a short time to cut one of the three wires in the alarm box, thus disabling the shutter to the corresponding chamber. After a wire is cut the alarm will inevitably be triggered, thus ending the stealth portion of the heist, and the police will be alerted. Provided the correct chamber wire was cut, the crew will have access to the target patient. He can be identified by the tattoo on his neck. If the wrong wire was cut, the crew must use the saw hidden in a "Teddy Moo" doll located in the lobby to saw open the other chambers and find the target.
If done correctly, stealth is forced to end, and proceeds to Plan B, on the Blood Samples section.
Similar to other stealthable heists, some portions of loud can be skipped by completing them on stealth.
- If before dressing as medical personnel, then the crew will need to bring the saw, also known as Teddy Moo, to cut through the main door.
- The crew will require to cover the saw and be vigilant of the three corridors in which enemies may arrive. It is also recommended to escort a civilian to safety in case one is needed. All heisters must be proactively keeping control of the enemies, or else they risk getting swarmed.
- In addition, there is no way to tell in which room the patient might be, so the carrier of the saw must gamble to choose one of the three possible rooms that he may be located in. Once placed, the crew must wait, protect, and maintain the saw while it cuts through. Worst case scenario is having to cut through all three of them.
- If the wrong wire was cut, then the crew will need to bring the saw, and cut through the patient's reinforced door.
- It may be possible to use the clues that Dr. Schneider said, and select a possible second room. If not, then the gamble logic is applied once again, although this time it will be a 50/50.
- If the correct wire was cut, Plan A is forced to end and the assault will begin immediately, starting the Blood Samples segment of the heist.
- Proceed to Blood Sample section.
Regardless of which step was completed on stealth, all of the crew members must be aware of their surroundings, for while it being a corridor makes it easy to have control of, the many spawn points on the roof can make it so Bulldozers and other Special Units can appear all of the sudden, catching heisters by surprise.
At the same time, protect the corridors of the Intensive Care Unit. While there are other areas that are easier to defend than the corridors with a little bit too many roof spawn points, you must still protect Teddy Moo for cutting through the ICU. Even if already cut through and the correct patient, it's not wise to let the room get swarmed in case you need more blood for testing.
Blood Samples
Once the target patient is located, regardless of which plan was executed to access him, the crew must extract blood samples from him. These samples must then be put in testers, which are available in various rooms around the hospital. The samples may break while being tested, leaving the tester temporarily unavailable. After a sample is successfully validated, it may be picked up by a heister. This will allow the crew to call for the elevator which will be used for the escape. At this point the police may cut the power to the hospital, stopping the elevator and killing the lights. The crew must locate a circuit breaker and restore power, and then recall the elevator.
Two validated blood samples must be acquired to proceed, they will be stored in a cooler in the elevator. If a heister is downed and enters bleed-out mode while carrying any blood sample, valid or untested, the vial will break and will be lost. Once two valid blood samples are placed in the cooler and the crew is in the elevator, the elevator will attempt to go up to the roof to be retrieved by Bain in a helicopter. At this point, the police will retreat, and the army will start firing missiles at the hospital. The elevator may reach its destination and the crew will escape in the helicopter, or the elevator may fall to the bottom. In either case, the crew must pry open the emergency hatch with a crowbar to escape the trapped elevator. In the event of the elevator falling to the basement level, the crew must make a breakthrough the morgue, passing by several squirming body bags. The heist ends once everyone reaches the end of the hallway.Strategy
- Anyone holding a blood vial must exercise extreme caution, as getting incapacitated will break said vial. If a player holding a vial is on low health, it strongly advised to heal, best with a first aid kit.
- One can simply not pick up more than one vial, as picking up one vial is enough for Bain to instruct the crew to call the elevator.
- Simply leave the second blood sample on the centrifuge until the elevator arrives, although this is only recommended if the centrifuge is not too far away, and if the crew has the situation under control and not getting overwhelmed by enemies.
- Uppers can also be a life-saver, especially to save a vial-carrying player.
- The narrow corridors can be easily used to gain a significant advantage for taking down enemies.
- Snipers and Graze – The narrow corridors makes it so a correctly aligned headshot will be enough to kill almost every unit on its path. This heist, together with other interior-based maps, makes Graze as effective as it can get.
- Sniper-related achievements for kills-in-a-row are also easily achievable here.
- Light Machine Guns – If one sets a position with a bipod, one can become a sentry and kill any enemy that comes in sight, albeit with difficulties if a Shield or Bulldozer were to appear, or if enemies were to spawn behind or side from the heister.
- LMGs chew through ammo fast. Be sure to collect ammo every once in a while, at least above 50% ammo capacity, to prevent the possibility of running out of ammo in a critical scenario.
- (Akimbo) Shotguns – Due to how shotguns work, a single pellet is enough to deal full damage. Combine this with simply having to aim at head level, and having to focus on nothing but a handful of degrees from your field of view, shotguns are well capable of clearing corridors.
- Sentry Guns – The most notorious vulnerability for sentry guns is the fact of how easily they can be flanked. However, corridors make it so it will be borderline impossible for enemies to flank them without having taken significant, or lethal damage thanks to having an amazing field of view range for autonomously attacking enemies.
- Due to having a large field of view, they may run out of ammo rapidly. Have them set on AP mode, and keep in mind to refill their ammo constantly.
- Snipers and Graze – The narrow corridors makes it so a correctly aligned headshot will be enough to kill almost every unit on its path. This heist, together with other interior-based maps, makes Graze as effective as it can get.
Variations
- The positions of the security camera will change. Possible locations include the room with the elevator, the main reception room, the ICU hallway, and the side office hallway.
- The target patient's location will be different each time. If the first section is stealthed, one can figure out which quarantine room holds the target; if not, one must saw through the doors randomly.
- The escape method will either be via helicopter, in which case the only priority the crew must look out is for a pair of Cloakers spawning in the vents; If via ambulance, the crew must open two hatches with the crowbar, being slightly more time consuming.
Differences from PAYDAY: The Heist
- Involvement of the US Army seems to have been retconned in favor of Murkywater private aircraft hitting the building with missiles.
- Security cameras and the guards in the ICU (if players have swapped their outfits for medical scrubs) will not detect players no matter their concealment value.
- However, getting too close to the security guard near the ICU door prior to changing outfits can cause the heist to go loud prematurely.
- In fact, if one wishes to start loud as soon as possible, one can walk straight to the guard to skip Bain's dialogue for the cameras, and then kill one random civilian in the lobby to skip Bain's countdown timer.
- However, getting too close to the security guard near the ICU door prior to changing outfits can cause the heist to go loud prematurely.
- Of note, Bain does not state the civilians have heart pagers unlike in the original, but killing any one of them will sound the alarm.
- The nurse's name is changed from "Dr. Eriksson" to "Dr. Schneider". Nevertheless, her role is unchanged.
Mayhem+ Changes
- Greatly increased civilian count at the start of the heist, regardless of player count.
Note: Unlike regular stealthable heists on Mayhem+, the amount of cameras spawned is not based on the difficulty, but on the current amount of players that were identified at the start of the heist.
Lore


By destroying Mercy Hospital, the lore of PAYDAY no longer connects with Left 4 Dead.
It is explicitly stated Bain is infected with the virus stolen from Mercy Hospital during this heist; however, several parts of the story have been retconned. Most notably, Bain's payment for the heist is now the "Cagliostro manuscript", a book which he found "important" enough to take on such a "shady" job. This book was not mentioned prior. The heist also seems to lack any elements of infected from the original, although Bill from Left 4 Dead still makes a cameo and the patient is shown to be slowly mutating.
In addition, OVERKILL implemented a method to allow for the No Mercy heist to be lore-friendly: Regardless of how the crew escapes, whether it be by the roof or escape by ambulance, Mercy Hospital will be destroyed. This is also one of the reasons as for why the heist was made from being a nightmare, into a real heist that took place canonically in the PAYDAY universe. In theory, this method scraps any possible conflicts between the lore of PAYDAY and Left 4 Dead, creating its own timeline where The Green Flu outbreak never begun.
There are hints Murkywater are involved, as Bain may mention he saw "merc units surrounding the building", though he does not recognize the "shark logo".
The FBI Files
No Mercy does not have an entry.
Bugs
- Occasionally, the voice line where Bain instructs the crew to get into scrubs will not play. The "play doctor" objective will still be present, but the zone to get into scrubs will not appear, and the heist softlocks until a guard spawns and is killed.
- On occasion, the elevator will not move after securing both blood samples, rendering the heist stuck.
- If the mission goes loud before all the cameras are destroyed, Bain may never give any objectives past controlling the hostages, softlocking the heist.
- If the final camera is destroyed just as Bain's countdown to alarm expires, the police may not arrive and the heist will softlock.
- If players decide to mask up and cut a cable before the doctor can describe the patients' symptoms, the heist objectives will never update beyond finding the right patient even if he is found.
- A blood testing machine may get stuck for very longer periods of time or become static after verifying a blood sample, rendering it unusable for the remainder of the heist.
- All descriptions in this heist read ---. All of Bain's lines will only trigger once, there are no reminders in this heist.
- It is possible for Bill to become alerted in the elevator, even when the doors are closed and he's unreachable.
- Bots may be in their combat pose for a moment after swapping outfitts.
Gage Courier Packages
No Mercy does not have Gage Courier Packages spawn points.
Achievements & Trophies

|
Just Some Medical Students Complete the No Mercy job on the Normal difficulty or above. |

|
Interns on the Floor Complete the No Mercy job on the Hard difficulty or above. |

|
Becoming Residents Complete the No Mercy job on the Very Hard difficulty or above. |

|
A General Practitioner of the Medical Art Complete the No Mercy job on the OVERKILL difficulty or above. |

|
A Couple of Fellows Complete the No Mercy job on the Mayhem difficulty or above. |

|
Attending the Ill and Sick Complete the No Mercy job on the Death Wish difficulty or above. |

|
Consulting the Chief Physician Complete the No Mercy job on the Death Sentence difficulty. |

|
Filing for Malpractice Complete the No Mercy job on the Death Sentence difficulty with the One Down mechanic activated. |

|
Keeping the Cool Complete the No Mercy job on the hard difficulty or above without raising the alarm before reaching the ICU. |

|
Nyctophobia Complete the No Mercy on the hard difficulty or above, getting the power back up within 5 seconds of it being shut down. |

|
...or was it the blue one In the No Mercy job, cut the correct wire opening the ICU door security system. |
|
|
Nyctophobia Complete the No Mercy on the hard difficulty or above, getting the power back up within 5 seconds of it being shut down. |
- Note: This achievement can only be attempted before the elevator arrives, as the police will no longer try to shut down the power once it does.
- Some players have reported it only being possible to unlock this achievement by restoring power within 5 seconds of it being cut the first time. Missing this window may render the achievement void even if power is restored on time on subsequent cuts.
- Due to desync, it is preferable that the host be the one to turn the power back on.
- As the minimum difficulty requirement for this achievement is Hard, the team could assign one to two players guarding the circuit breakers in the dining area, as the rest can be covered quite easily by standing ground in the ICU hallway with one member watching the elevator.
<gallery widths="200" columns="3" position="center" spacing="small" captionsize="large" captionalign="center" hideaddbutton="true">
Trophy-Bain'sGuide.png|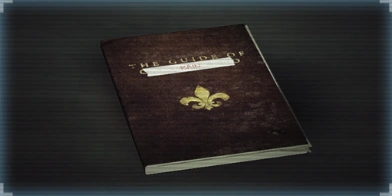
- "Bain received The Guide of Cagliostro as payment for a heist against a hospital in New York many years ago"
- —Trophy description
UNLOCK CONDITION:
Complete the No Mercy job on the Normal difficulty or above.
PLACEMENT:
Duke's Gallery.
Trivia
- The achievement names for this heist are throwbacks to elements of the original No Mercy. In addition, the image of the difficulty achievements is that of the Teddy Moo doll.
- Unlike the rest of the Classic heists, the No Mercy remake is explicitly considered to be a flashback to the original, and not a plausible revisit of an old location.
- Owing to this heist being technically a flashback, certain heisters will mention how the mission feels "wrong" and that they "shouldn't be here".
- Despite the storyline and remake being rearranged to avoid Left 4 Dead lore interfering with PAYDAY's, there are still a handful of non-canon references.
- The patient and the bodies in the morgue will randomly play groaning noises that are the same used in the L4D series.
- In addition, the bodies in the morgue will randomly twitch when a heister gets close enough. No biting, however.
- The Witch may make an appearance in the only inaccessible room that is located near the reception. This may occur when the power is cut by the cops. She will despawn after a set timer, or after a heister takes a peek at her.
- Bill does reappear in a cameo in the remastered version, although he does not have any new lines due to his voice actor Jim French passing away on December 20, 2017.[1]
- The patient and the bodies in the morgue will randomly play groaning noises that are the same used in the L4D series.
- While it is never stated in the Left 4 Dead universe, the virus stolen in this heist is said to be "man-made".
- Under the implication that if, the original strain is based on The Green Flu, several modifications were made to the strain that was injected into Bain.
- These include removing the capability to turn into an infected (e.g. the patient), is not airborne, and does not become psychologically unstable. However, the capability to boost the carrier's physical capacity is kept, or even further improved, allowing the carrier to gain increased durability to fight through the pain.
- Under the implication that if, the original strain is based on The Green Flu, several modifications were made to the strain that was injected into Bain.
- For some reason, Bain does not recognize the apparent Murkywater units outside the hospital despite them previously appearing in Slaughterhouse of PAYDAY: The Heist. However, it could be possible Slaughterhouse occurred after the original No Mercy heist.
- No Mercy is one of the few non-event heists to date that do not have their own entry in the FBI Files database. Presumably, Mercy Hospital was never rebuilt after Murkywater/the Military bombed it and/or knowledge of the entire incident was suppressed.
- All of the post-White House heists (Border Crossing, Border Crystals and San Martín Bank) also do not have an FBI Files database entry.
Gallery
")
")
")
")
References
<references>
| Misc. | Safe House (Laundromat Safe House) | |
| Game Modes | Crime Spree • Holdout | |
- ↑ Good, Owen S. "Jim French, Left 4 Dead’s Bill, dies at 89" Polygon, December 30, 2017